Transforming A USB Drive Into A Powerful Tool: Creating A Bootable Drive
Transforming a USB Drive into a Powerful Tool: Creating a Bootable Drive
Related Articles: Transforming a USB Drive into a Powerful Tool: Creating a Bootable Drive
Introduction
With enthusiasm, let’s navigate through the intriguing topic related to Transforming a USB Drive into a Powerful Tool: Creating a Bootable Drive. Let’s weave interesting information and offer fresh perspectives to the readers.
Table of Content
Transforming a USB Drive into a Powerful Tool: Creating a Bootable Drive
In the digital realm, a bootable USB drive stands as a versatile and essential tool. It empowers users to perform various tasks, from installing operating systems to recovering data, and even booting into specific environments for troubleshooting or testing purposes. This article delves into the intricacies of creating a bootable USB drive, outlining its importance, exploring different methods, and addressing common queries.
Understanding the Essence of a Bootable USB Drive
A bootable USB drive, also known as a bootable flash drive, is a portable storage device containing a special type of data that allows a computer to initiate its startup process directly from the USB drive instead of its internal hard drive. This functionality arises from the presence of a bootable operating system or a specific software program residing on the USB drive.
Importance of Creating a Bootable USB Drive
The creation of a bootable USB drive unlocks a multitude of possibilities, making it an invaluable asset for various scenarios:
-
Operating System Installation: A bootable USB drive containing an operating system image enables users to install or reinstall an operating system on a computer without the need for an optical disc drive. This is particularly crucial for modern systems that lack optical disc drives or for situations where the hard drive is corrupted or inaccessible.
-
Data Recovery: When a hard drive fails or experiences data loss, a bootable USB drive containing data recovery software provides a lifeline. It allows users to access the corrupted drive and potentially recover lost data.
-
System Troubleshooting: A bootable USB drive containing diagnostic tools or a live operating system can be used to troubleshoot system issues, such as boot errors, malware infections, or hardware failures. It provides a safe and isolated environment to diagnose and repair problems without affecting the main operating system.
-
Testing and Experimentation: A bootable USB drive allows users to test new operating systems, software, or configurations in a virtualized environment without impacting the primary operating system. This is especially beneficial for developers, system administrators, and those who wish to explore different software options.
-
Creating a Portable Workspace: A bootable USB drive can be configured to include essential applications, software, and personal files, creating a portable workspace that can be accessed from any computer. This is useful for individuals who frequently work on multiple computers or require a consistent work environment.
Methods for Creating a Bootable USB Drive
The process of creating a bootable USB drive involves several steps, which vary depending on the desired outcome and the software or operating system being used. The most common methods include:
1. Using a USB Flash Drive Formatting Tool
Many operating systems come with built-in tools that allow users to format a USB drive and make it bootable. This method is generally straightforward and involves:
- Selecting the USB drive: Identify the USB drive that will be used for bootable purposes.
- Formatting the USB drive: Use the built-in formatting tool to format the USB drive as FAT32 or NTFS, depending on the requirements of the operating system or software to be installed.
- Creating a bootable partition: In some cases, the formatting tool may allow users to create a separate bootable partition on the USB drive.
- Copying the bootable files: Transfer the operating system files or software program to the USB drive.
2. Utilizing Third-Party Software
Several third-party software applications are specifically designed to create bootable USB drives. These tools often offer additional features and customization options, making the process more efficient and user-friendly. Popular options include:
-
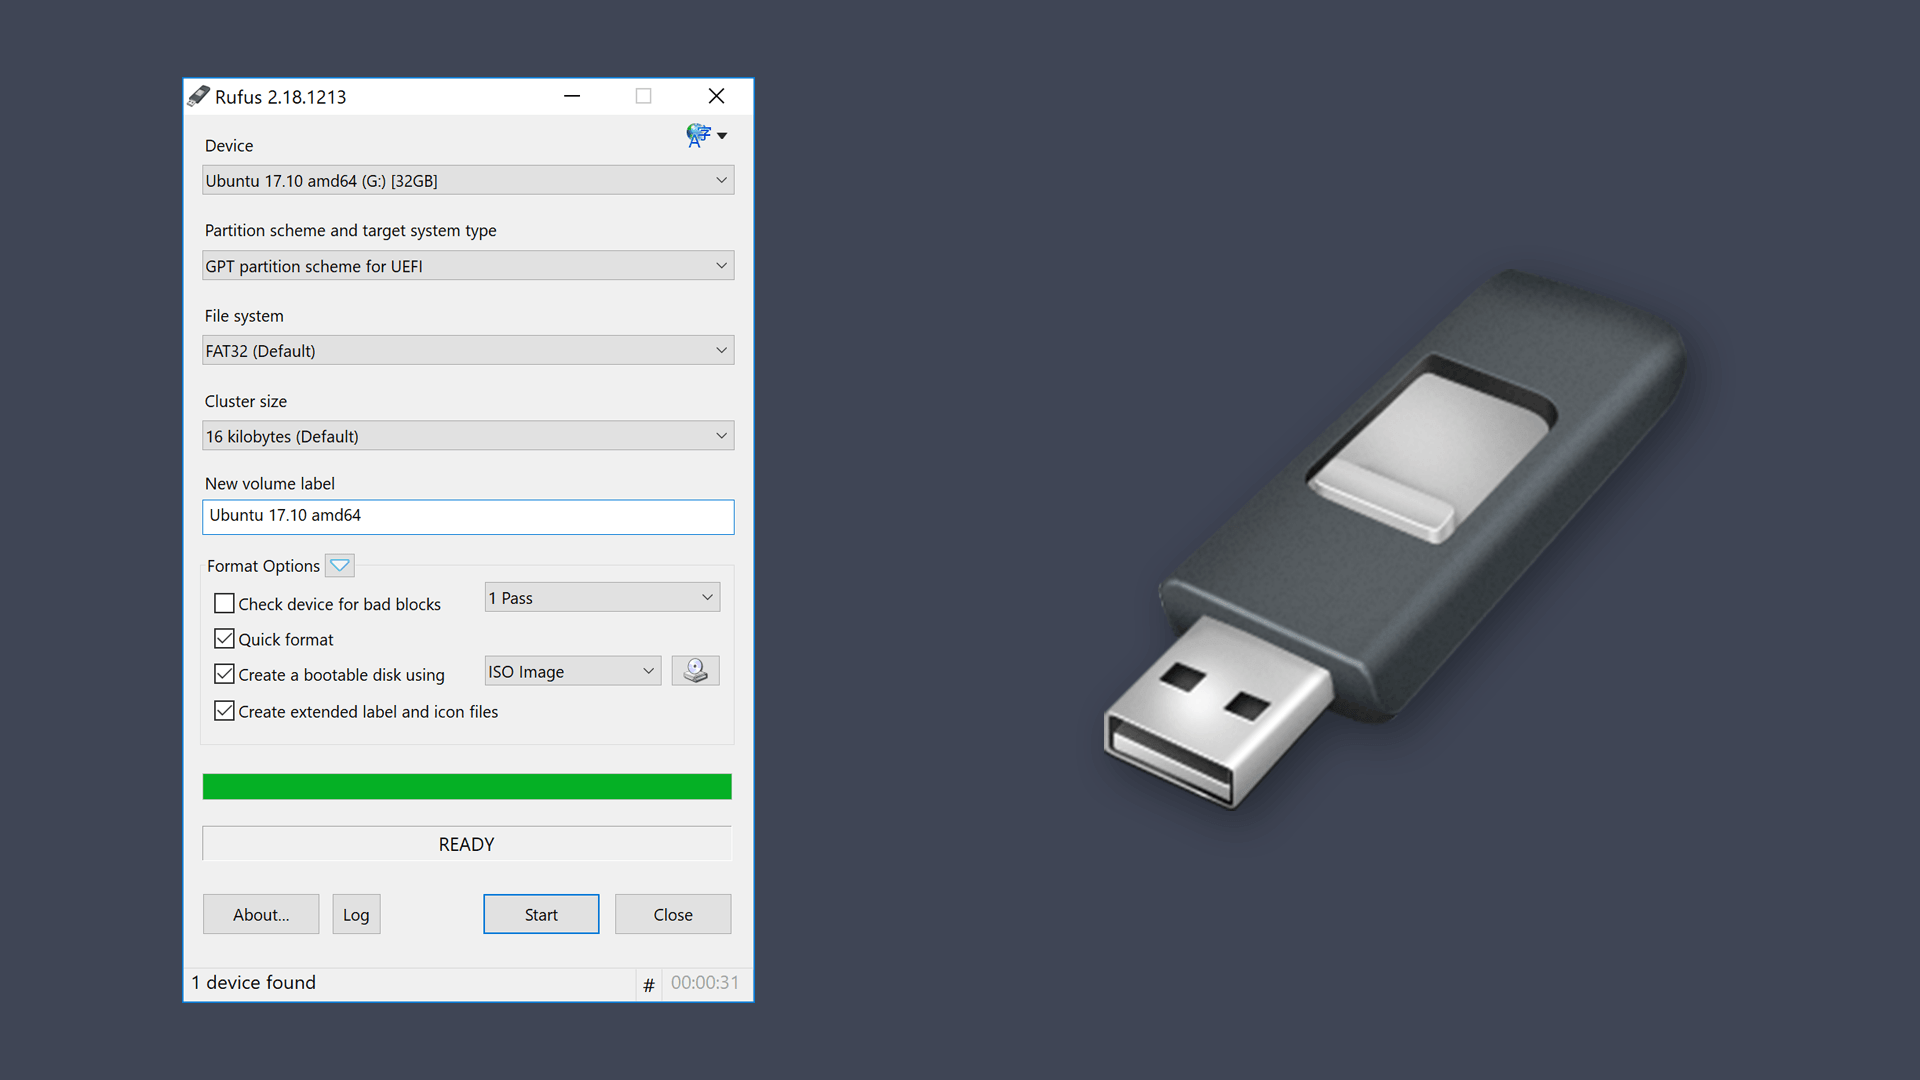
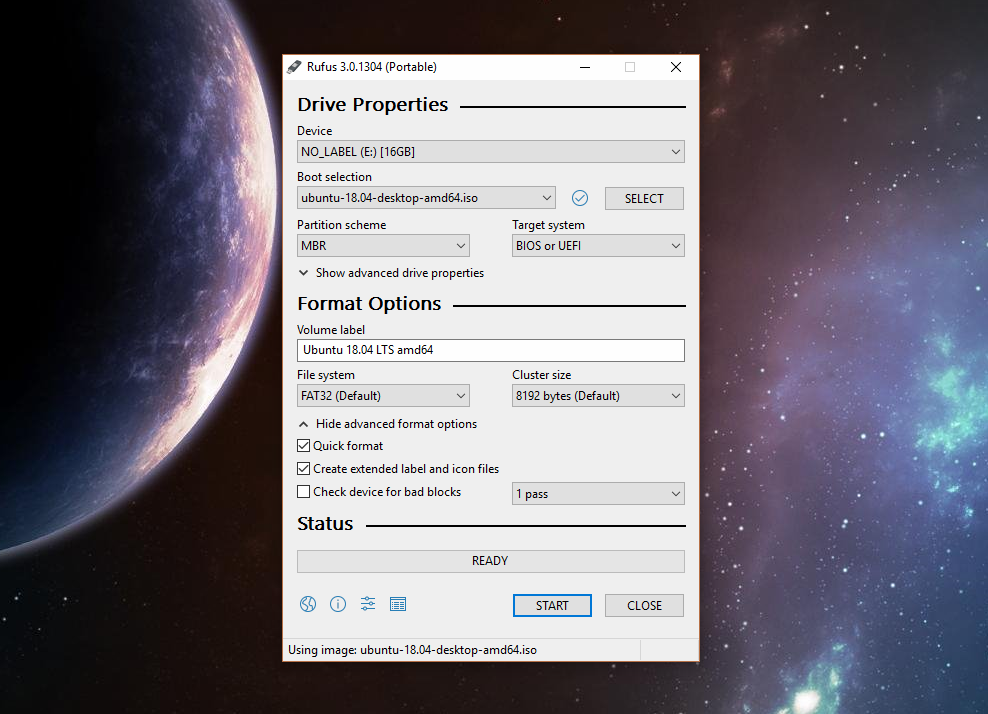
Rufus: A lightweight and portable tool that allows users to create bootable USB drives for various operating systems, including Windows, Linux, and macOS.
-
Etcher: A cross-platform tool that focuses on simplicity and ease of use, making it ideal for beginners.
-
UNetbootin: A versatile tool that supports creating bootable drives for various operating systems, including Linux distributions, Windows, and macOS.
-
Balena Etcher: A powerful tool designed for flashing operating systems and images onto SD cards and USB drives.
3. Using the Command Prompt (Windows)
For users comfortable with command-line interfaces, the Windows Command Prompt can be used to create a bootable USB drive. This method involves:
- Opening the Command Prompt: Access the Command Prompt by searching for it in the Windows search bar.
- Using the DISKPART command: Enter the DISKPART command to manage disk partitions.
-
Selecting the USB drive: Identify the USB drive using the
list diskcommand and select it using theselect diskcommand. -
Creating a partition: Create a primary partition on the USB drive using the
create partition primarycommand. -
Formatting the partition: Format the partition as FAT32 or NTFS using the
formatcommand. -
Assigning a drive letter: Assign a drive letter to the USB drive using the
assigncommand. - Copying the bootable files: Transfer the operating system files or software program to the USB drive.
4. Utilizing the macOS Disk Utility
macOS users can leverage the built-in Disk Utility to create bootable USB drives. The process involves:
- Opening Disk Utility: Access Disk Utility by searching for it in Spotlight.
- Selecting the USB drive: Identify the USB drive in the Disk Utility window.
- Erasing the USB drive: Erase the USB drive using the "Erase" button and select the appropriate format (usually macOS Extended (Journaled)).
- Creating a bootable partition: Create a bootable partition by selecting the "Partition" button and adjusting the partition size.
- Copying the bootable files: Transfer the operating system files or software program to the USB drive.
FAQs about Creating a Bootable USB Drive
1. What types of USB drives can be used for bootable purposes?
Any USB flash drive with sufficient storage space can be used to create a bootable drive. However, it is recommended to use a high-quality, reliable USB drive to ensure data integrity and prevent errors during the boot process.
2. What format should I use for the bootable USB drive?
The format required for a bootable USB drive depends on the operating system or software being installed. Most operating systems support FAT32 or NTFS formats.
3. Can I create a bootable USB drive from an ISO image?
Yes, many tools, such as Rufus and Etcher, allow users to create bootable USB drives from ISO images. An ISO image is a file that contains the entire contents of a bootable disc, such as a CD or DVD.
4. What happens if I create a bootable USB drive and then use it for other purposes?
Creating a bootable USB drive does not permanently alter its functionality. You can use it for other purposes, such as storing files, after it has been used to create a bootable drive. However, it is recommended to keep the bootable files intact on the USB drive to ensure its bootability.
5. Can I create a bootable USB drive on a Mac to use on a Windows computer?
Yes, you can create a bootable USB drive on a Mac to use on a Windows computer. However, you need to ensure that the operating system or software on the USB drive is compatible with Windows.
Tips for Creating a Bootable USB Drive
-
Use a high-quality USB drive: Choose a reliable USB drive with sufficient storage space to ensure data integrity and prevent errors.
-
Back up important data: Before formatting the USB drive, back up any important data stored on it to avoid accidental data loss.
-
Choose the correct format: Select the appropriate format for the bootable USB drive based on the requirements of the operating system or software being installed.
-
Verify the bootability: After creating the bootable USB drive, test it by booting your computer from it to ensure it functions correctly.
-
Keep the bootable files intact: Avoid deleting or modifying the bootable files on the USB drive to maintain its bootability.
Conclusion
Creating a bootable USB drive empowers users to perform various tasks, from installing operating systems to recovering data, and even booting into specific environments for troubleshooting or testing purposes. It is a versatile and essential tool that can be created using various methods, including built-in operating system tools, third-party software, or command-line interfaces. Understanding the process, choosing the right method, and following best practices ensures the creation of a reliable and functional bootable USB drive that unlocks a multitude of possibilities in the digital world.


Closure
Thus, we hope this article has provided valuable insights into Transforming a USB Drive into a Powerful Tool: Creating a Bootable Drive. We hope you find this article informative and beneficial. See you in our next article!