Securing Your Windows 10 System: Automatic Lock For Enhanced Protection
Securing Your Windows 10 System: Automatic Lock for Enhanced Protection
Related Articles: Securing Your Windows 10 System: Automatic Lock for Enhanced Protection
Introduction
With enthusiasm, let’s navigate through the intriguing topic related to Securing Your Windows 10 System: Automatic Lock for Enhanced Protection. Let’s weave interesting information and offer fresh perspectives to the readers.
Table of Content
Securing Your Windows 10 System: Automatic Lock for Enhanced Protection
In today’s digital landscape, safeguarding personal and sensitive data is paramount. While Windows 10 offers a robust security framework, it is crucial to implement proactive measures to further strengthen protection. One such measure is the automatic locking of your computer, a simple yet effective step that can significantly enhance security. This article delves into the intricacies of automatically locking your Windows 10 system, exploring its benefits, configuration methods, and potential challenges.
The Importance of Automatic Locking
Automatic locking is an indispensable security practice that minimizes the risk of unauthorized access to your computer. When you step away from your workstation, even for a brief moment, your system remains vulnerable. A passerby could potentially access your data, modify system settings, or even compromise your account. Automatic locking mitigates this risk by locking your system after a predetermined period of inactivity.
Benefits of Automatic Locking
Implementing automatic locking brings a multitude of benefits, enhancing the overall security posture of your Windows 10 system:
- Data Protection: Automatic locking prevents unauthorized access to your files, ensuring the confidentiality and integrity of your data.
- Account Security: By locking your system, you safeguard your user account from potential misuse or unauthorized login attempts.
- System Integrity: Locking prevents unauthorized modifications to your system settings, ensuring stability and functionality.
- Compliance: In many workplaces and organizations, automatic locking is a mandatory security policy, ensuring compliance with industry standards and regulations.
- Peace of Mind: Knowing your system is automatically locked when unattended provides peace of mind, reducing anxiety about potential security breaches.
Configuring Automatic Locking in Windows 10
Windows 10 offers several methods for configuring automatic locking, each catering to different preferences and system configurations.
1. Using the Power Options:
- Access the Power Options by searching for "Power Options" in the Windows search bar.
- Navigate to "Choose what the power buttons do" on the left-hand pane.
- Click on "Change settings that are currently unavailable".
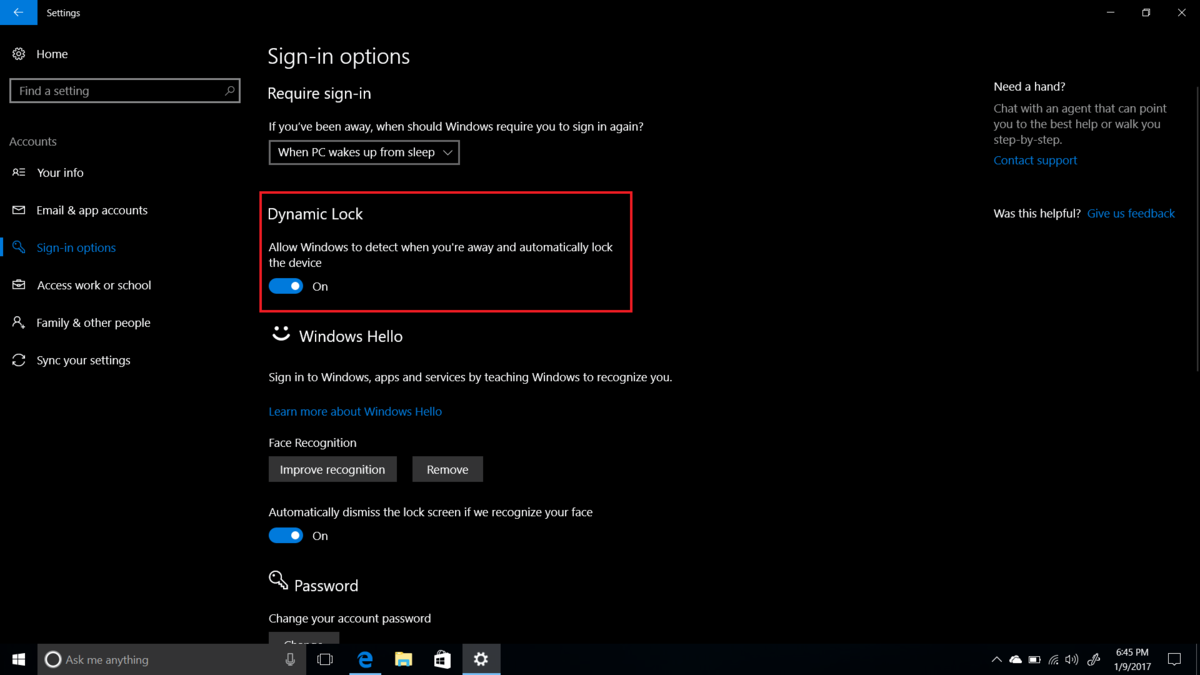
- In the "System Settings" window, select "Require a password on wakeup".
- This ensures that your system will prompt for a password upon waking from sleep or hibernation, effectively locking it until the correct password is entered.
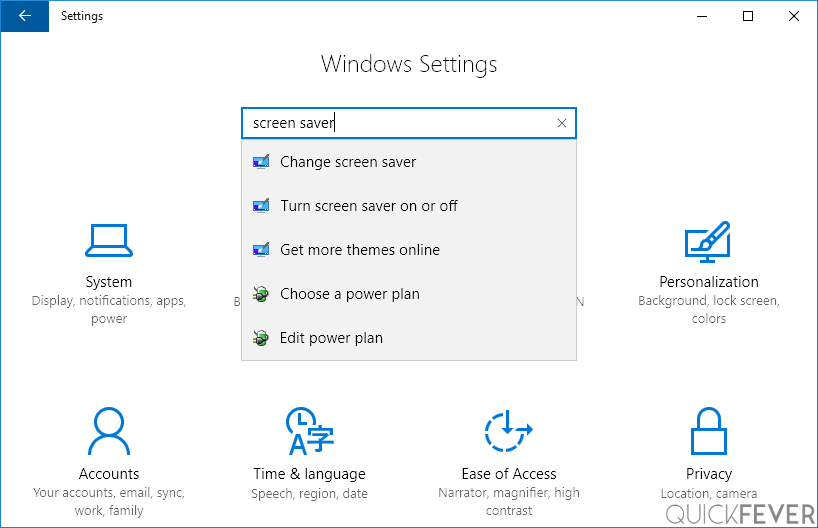
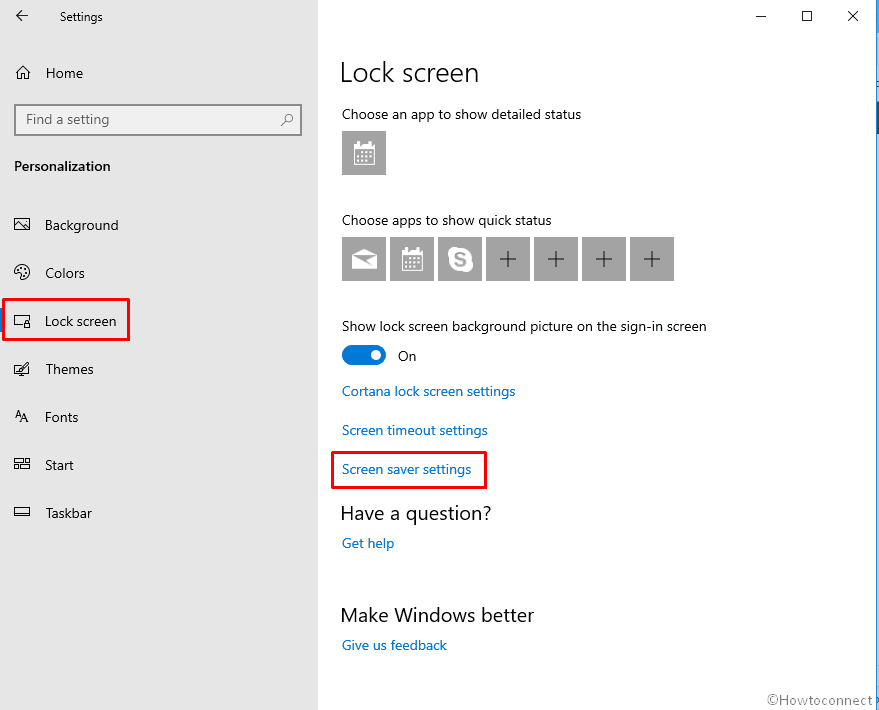
2. Utilizing the Screen Saver Settings:
- Access the Screen Saver Settings by searching for "Screen Saver" in the Windows search bar.
- Select the screen saver of your choice and enable the "On resume, display logon screen" option.
- This will automatically lock your system after the screen saver activates, requiring a password to unlock.
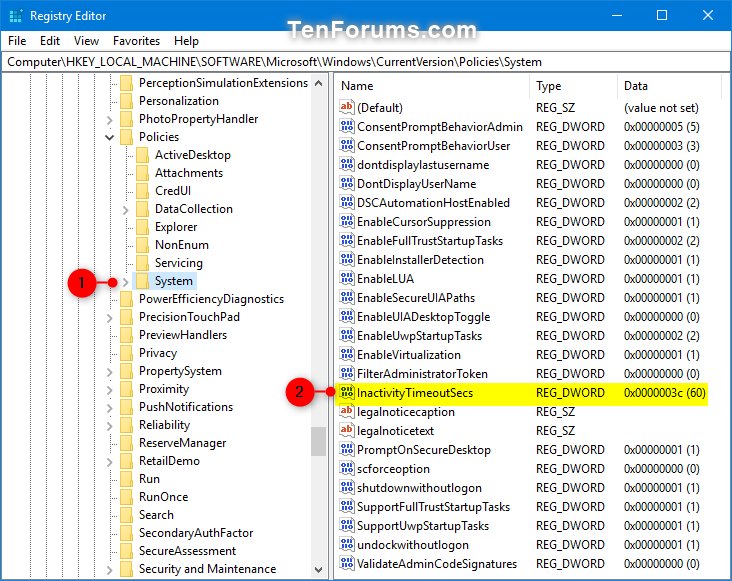
3. Employing the Group Policy Editor:
- Access the Group Policy Editor by searching for "gpedit.msc" in the Windows search bar.
- Navigate to Computer Configuration > Administrative Templates > System > Power Management > Sleep Settings.
- Locate the "Require a password on wakeup" policy and enable it.
- This ensures your system prompts for a password upon waking from sleep or hibernation, effectively locking it until the correct password is entered.
4. Leveraging Third-Party Applications:
- Numerous third-party applications offer enhanced automatic locking functionalities, allowing for customizable timeouts and advanced security features.
- Some popular options include AutoLock, Windows Lock, and LockHunter.
- These applications often provide more granular control over locking parameters, including specific inactivity periods, application-based locking triggers, and advanced security features.
Potential Challenges and Considerations
While automatic locking offers significant security advantages, it is essential to consider potential challenges and adjust settings accordingly:
- Inconvenience: Frequent locking can interrupt workflow, especially for users who frequently step away from their computers for short periods.
- Password Complexity: A strong password is crucial for effective locking, but overly complex passwords can lead to frustration and forgotten credentials.
- Accessibility: Users with disabilities might require adjustments to automatic locking settings to ensure seamless accessibility.
FAQs: Automatic Locking in Windows 10
1. How do I prevent my system from automatically locking during active use?
- You can adjust the inactivity timeout in the settings mentioned above. Increase the timeout period to a longer duration, allowing for more time between locking events.
2. Can I lock my system remotely?
- Yes, Windows 10 offers remote locking features through its built-in "Find My Device" service. You can lock your computer remotely using a web browser or the "Find My Device" app.
3. How do I disable automatic locking?
- You can disable automatic locking by reversing the settings mentioned above. Disable the "Require a password on wakeup" option, and uncheck the "On resume, display logon screen" option in the Screen Saver settings.
4. Is it possible to lock my system based on specific applications?
- Some third-party applications offer this functionality, allowing you to lock your system when specific applications are closed or minimized.
5. What are some best practices for securing my system with automatic locking?
- Set an appropriate inactivity timeout that balances security and convenience.
- Use a strong and unique password for your user account.
- Consider utilizing a password manager to securely store your credentials.
- Regularly review and update your system’s security settings.
Tips for Effective Automatic Locking
- Choose an appropriate inactivity timeout: Consider your typical workflow and set a timeout that balances security and convenience.
- Utilize a strong password: Choose a password that is difficult to guess and unique to your account.
- Enable screen lock: Ensure your screen locks automatically after a short period of inactivity, preventing unauthorized access to your system.
- Consider using a password manager: Store your passwords securely using a dedicated password manager to avoid forgetting them.
- Enable automatic updates: Keep your operating system and software up-to-date with the latest security patches and fixes.
Conclusion
Automatic locking is a vital security practice that significantly enhances the protection of your Windows 10 system. By configuring automatic locking, you safeguard your data, protect your account, and ensure system integrity. While implementing automatic locking might require some initial adjustments, the benefits far outweigh any potential inconvenience. By taking proactive steps to secure your system, you can confidently navigate the digital landscape, knowing that your data and privacy are well protected.


Closure
Thus, we hope this article has provided valuable insights into Securing Your Windows 10 System: Automatic Lock for Enhanced Protection. We hope you find this article informative and beneficial. See you in our next article!