Navigating The World Of Java 32-bit On Windows 11: A Comprehensive Guide
Navigating the World of Java 32-bit on Windows 11: A Comprehensive Guide
Related Articles: Navigating the World of Java 32-bit on Windows 11: A Comprehensive Guide
Introduction
With enthusiasm, let’s navigate through the intriguing topic related to Navigating the World of Java 32-bit on Windows 11: A Comprehensive Guide. Let’s weave interesting information and offer fresh perspectives to the readers.
Table of Content
Navigating the World of Java 32-bit on Windows 11: A Comprehensive Guide
The Java programming language, renowned for its versatility and widespread adoption, continues to be a cornerstone of software development. While newer versions of Java are optimized for 64-bit architectures, there are scenarios where using a 32-bit version on a 64-bit operating system like Windows 11 might be necessary. This article aims to provide a comprehensive guide to understanding the nuances of Java 32-bit on Windows 11, exploring its applications, download process, and potential challenges.
Understanding the 32-bit and 64-bit Distinction
The terms "32-bit" and "64-bit" refer to the architecture of a computer’s processor and the operating system. A 32-bit system can access a maximum of 4 GB of RAM, while a 64-bit system can access significantly more, often up to 128 GB or even more. While most modern computers and operating systems are 64-bit, certain legacy applications or software components might require a 32-bit environment to function correctly.
Why Choose Java 32-bit on Windows 11?
While Java 64-bit is generally preferred due to its increased performance and memory capacity, there are several reasons why one might need to use Java 32-bit on Windows 11:
- Legacy Application Compatibility: Some older applications, particularly those developed before the widespread adoption of 64-bit systems, might be designed to work exclusively with 32-bit Java.
- Software Dependencies: Specific software packages or libraries might have dependencies on 32-bit Java, requiring its installation for proper functionality.
- Limited System Resources: If a system has limited RAM or other hardware constraints, a 32-bit Java installation might be a viable option for optimizing resource usage.
- Specific Development Environments: Certain development environments or IDEs might require a 32-bit Java version for specific functionalities or plugins.
Downloading and Installing Java 32-bit on Windows 11
The process of downloading and installing Java 32-bit on Windows 11 is relatively straightforward. However, it’s crucial to ensure you are obtaining the software from a trusted source, such as the official Oracle website.
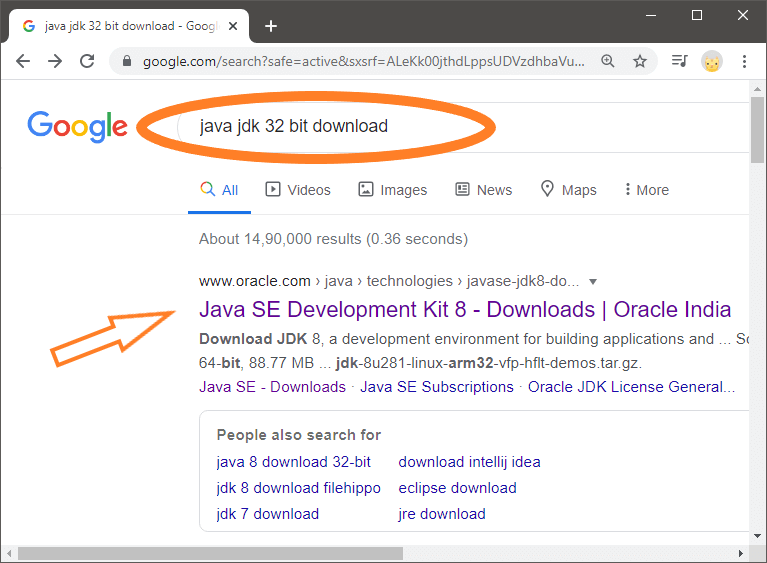
- Visit the Oracle Java Website: Navigate to the official Oracle Java website (https://www.oracle.com/java/technologies/javase-downloads.html).
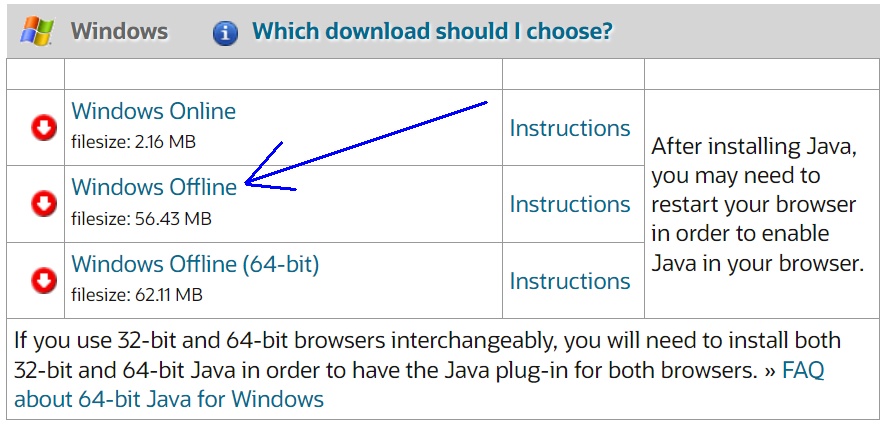
- Select the Appropriate Version: Choose the "Java SE Development Kit" (JDK) for your desired Java version. Look for the "Windows x86" option to download the 32-bit version.
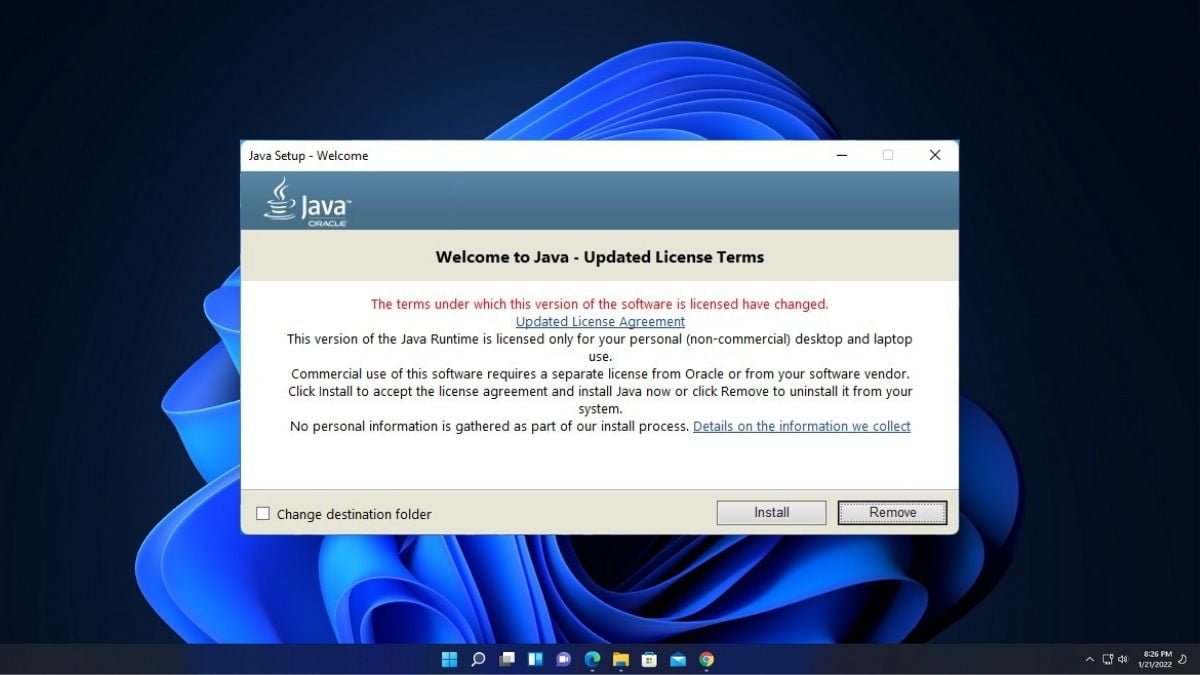
- Accept the License Agreement: Read and agree to the terms of the license agreement before proceeding with the download.
- Run the Installer: Once the download is complete, run the installer file and follow the on-screen instructions. Ensure you choose the appropriate installation directory and select the "Install" option.
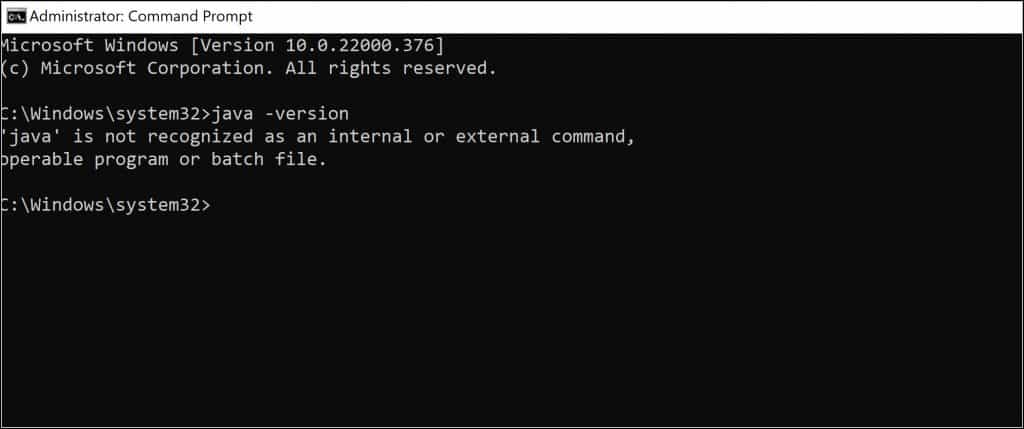
- Verify Installation: After installation, verify that Java 32-bit is correctly installed by opening a command prompt and typing "java -version." The output should display the installed Java version and architecture (32-bit).
Potential Challenges and Considerations
While the installation process is generally straightforward, certain challenges might arise when using Java 32-bit on Windows 11:
- Compatibility Issues: Legacy applications might still experience compatibility problems even with a 32-bit Java installation, requiring further troubleshooting or alternative solutions.
- Performance Limitations: Due to the 4 GB RAM limitation, performance might be affected compared to 64-bit Java, especially for applications requiring significant memory resources.
- Security Considerations: Older Java versions might have security vulnerabilities, requiring regular updates to mitigate potential risks.
Addressing Common Java 32-bit Concerns
To address potential concerns and ensure a smooth experience, consider the following recommendations:
- Keep Java Up-to-Date: Regularly update your Java installation to the latest version, including security patches, to minimize vulnerabilities and improve performance.
- Use a Dedicated Java Installation: Avoid installing multiple Java versions on the same system to prevent conflicts and maintain clarity.
- Utilize Virtual Machines: For legacy applications that require a specific Java version or environment, consider using a virtual machine to create a separate environment for their execution.
- Consult Documentation: Refer to the official documentation of the application or software package for specific instructions on configuring Java 32-bit settings.
FAQs on Java 32-bit on Windows 11
Q1: Can I run Java 64-bit applications on a 32-bit Java installation?
No, 64-bit applications are designed to run on 64-bit architectures and will not function correctly with a 32-bit Java installation.
Q2: Is it possible to install both Java 32-bit and 64-bit on the same system?
Yes, it is possible to install both 32-bit and 64-bit Java versions on the same system. However, ensure you select the correct version when running applications or using Java-related commands.
Q3: How do I determine which Java version is currently being used by an application?
You can use the "java -version" command in the command prompt to identify the Java version currently used by the system.
Q4: Are there any performance penalties for using Java 32-bit on a 64-bit system?
Yes, there might be performance penalties due to the limitations of 32-bit architecture and the potential for compatibility issues with modern applications.
Q5: Can I use Java 32-bit for web development on Windows 11?
While it’s technically possible, it is generally not recommended for web development. Modern web development frameworks and libraries are optimized for 64-bit architectures and might not function correctly with a 32-bit Java installation.
Tips for Using Java 32-bit on Windows 11
- Prioritize Compatibility: If using Java 32-bit for legacy applications, ensure the application is compatible with the chosen Java version.
- Optimize System Resources: If using Java 32-bit on a system with limited resources, consider allocating sufficient memory for the Java runtime environment.
- Monitor Performance: Observe the performance of applications running on Java 32-bit and consider alternative solutions if significant performance issues arise.
- Stay Informed: Keep yourself informed about the latest Java updates and security patches to ensure a secure and stable environment.
Conclusion
While 64-bit Java is the preferred choice for most modern applications and systems, Java 32-bit still holds relevance in specific scenarios. Understanding its applications, download process, and potential challenges is crucial for making informed decisions about its use. By following the guidelines outlined in this article, users can navigate the world of Java 32-bit on Windows 11 effectively and ensure compatibility with legacy applications and software components. Remember to prioritize security, performance, and compatibility while leveraging the benefits of this versatile programming language.


Closure
Thus, we hope this article has provided valuable insights into Navigating the World of Java 32-bit on Windows 11: A Comprehensive Guide. We appreciate your attention to our article. See you in our next article!