Mastering Microphone Setup In Windows 11: A Comprehensive Guide
Mastering Microphone Setup in Windows 11: A Comprehensive Guide
Related Articles: Mastering Microphone Setup in Windows 11: A Comprehensive Guide
Introduction
In this auspicious occasion, we are delighted to delve into the intriguing topic related to Mastering Microphone Setup in Windows 11: A Comprehensive Guide. Let’s weave interesting information and offer fresh perspectives to the readers.
Table of Content
- 1 Related Articles: Mastering Microphone Setup in Windows 11: A Comprehensive Guide
- 2 Introduction
- 3 Mastering Microphone Setup in Windows 11: A Comprehensive Guide
- 3.1 Understanding Microphone Types and Connections
- 3.2 Step-by-Step Guide to Microphone Setup in Windows 11
- 3.3 Troubleshooting Microphone Issues in Windows 11
- 3.4 Tips for Optimizing Microphone Setup in Windows 11
- 3.5 FAQs about Microphone Setup in Windows 11
- 3.6 Conclusion
- 4 Closure
Mastering Microphone Setup in Windows 11: A Comprehensive Guide

In the modern digital landscape, microphones have become indispensable tools for communication, collaboration, and creative expression. Whether you’re engaging in virtual meetings, recording podcasts, or simply enjoying online gaming, having a properly configured microphone ensures clear and effective audio transmission. Windows 11, with its refined interface and enhanced audio capabilities, provides a user-friendly platform for microphone setup, empowering users to optimize their audio experience. This comprehensive guide will delve into the intricacies of microphone setup in Windows 11, offering detailed instructions and insightful tips to ensure seamless communication and high-quality audio recording.
Understanding Microphone Types and Connections
Before embarking on the setup process, it’s crucial to understand the different microphone types and connection methods commonly encountered in Windows 11.
Microphone Types:
- Condenser Microphones: These microphones require external power (phantom power) to operate and are known for their sensitivity, capturing subtle nuances in sound. They are commonly used in recording studios and for professional voice-over work.
- Dynamic Microphones: These microphones are robust and can withstand high sound pressure levels, making them suitable for live performances and recording loud instruments. They do not require external power.
- USB Microphones: These microphones are plug-and-play devices that connect directly to a computer via a USB port. They are convenient and widely used for various applications, including video conferencing and gaming.
Connection Methods:
- USB: The most prevalent connection method for microphones, USB offers plug-and-play convenience and compatibility with most Windows 11 devices.
- XLR: This professional audio connector is typically used with condenser microphones and requires a dedicated audio interface to connect to a computer.
- TRS (3.5mm Jack): This common connector is found on many laptops and smartphones and is suitable for connecting microphones with a built-in preamplifier.
Step-by-Step Guide to Microphone Setup in Windows 11
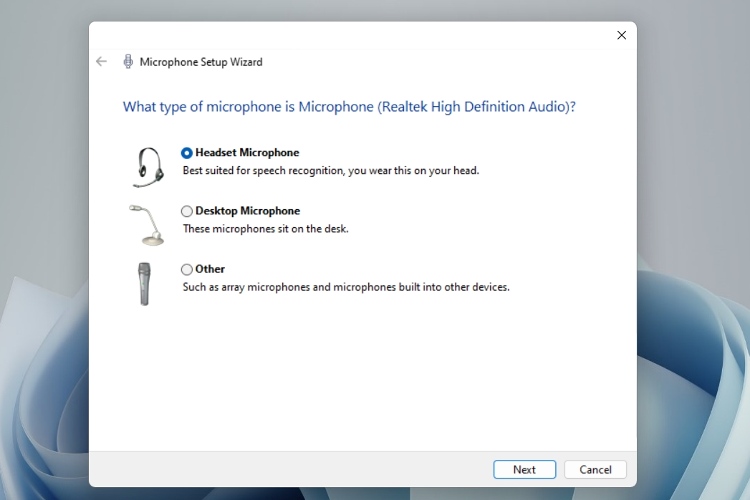
1. Connect the Microphone:
- USB: Simply plug the microphone’s USB connector into an available port on your computer. Windows 11 will automatically detect the device and install necessary drivers.
- XLR: Connect the microphone to an audio interface, and then connect the interface to your computer via USB or another appropriate connection.
- TRS: Plug the microphone’s TRS connector into the microphone jack on your computer or an external audio device.
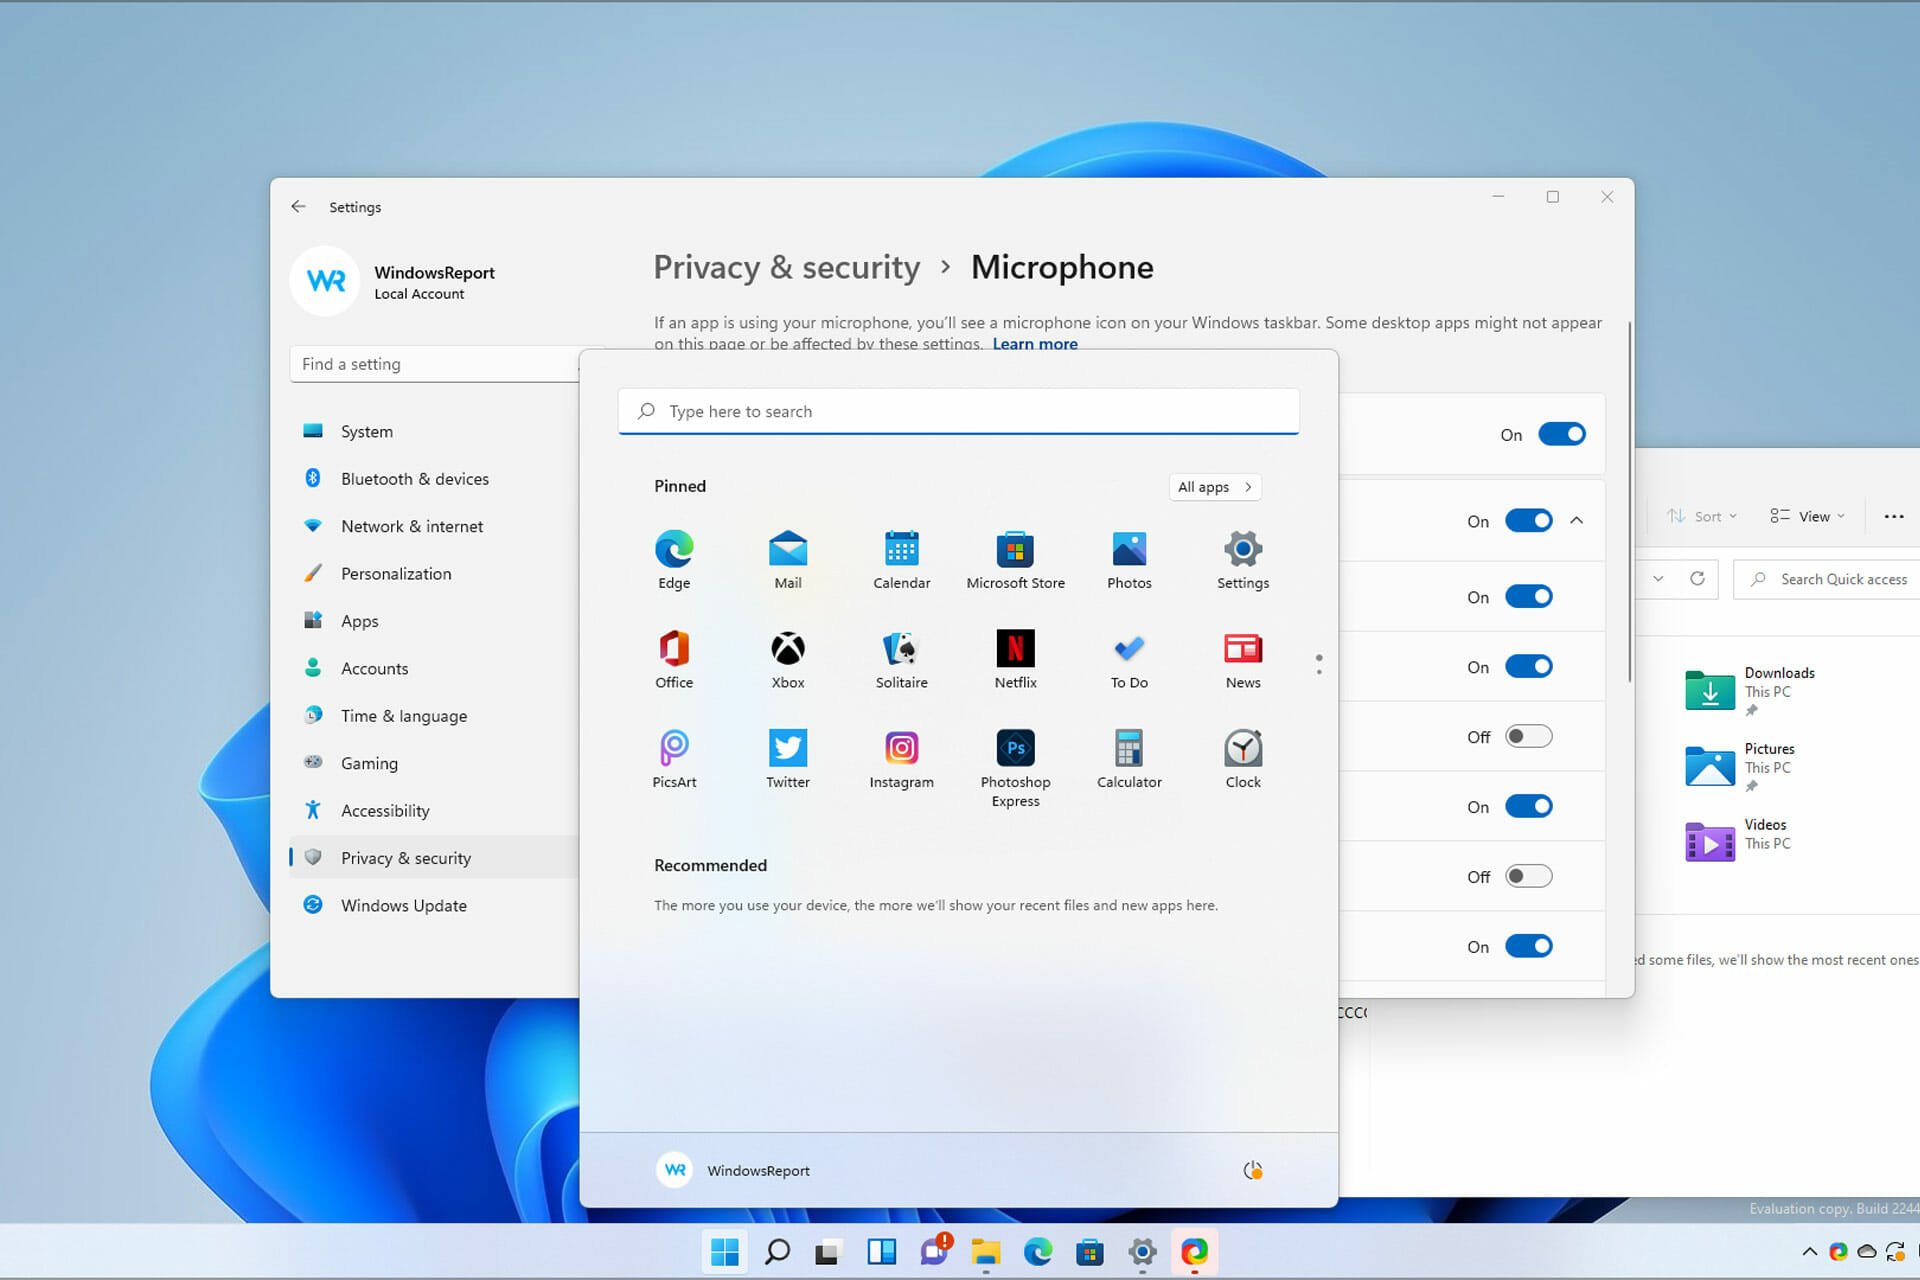
2. Access Sound Settings:
- Method 1: Click the Start button, type "Sound settings" in the search bar, and select the best match.
- Method 2: Right-click the speaker icon in the taskbar and select "Sound settings."
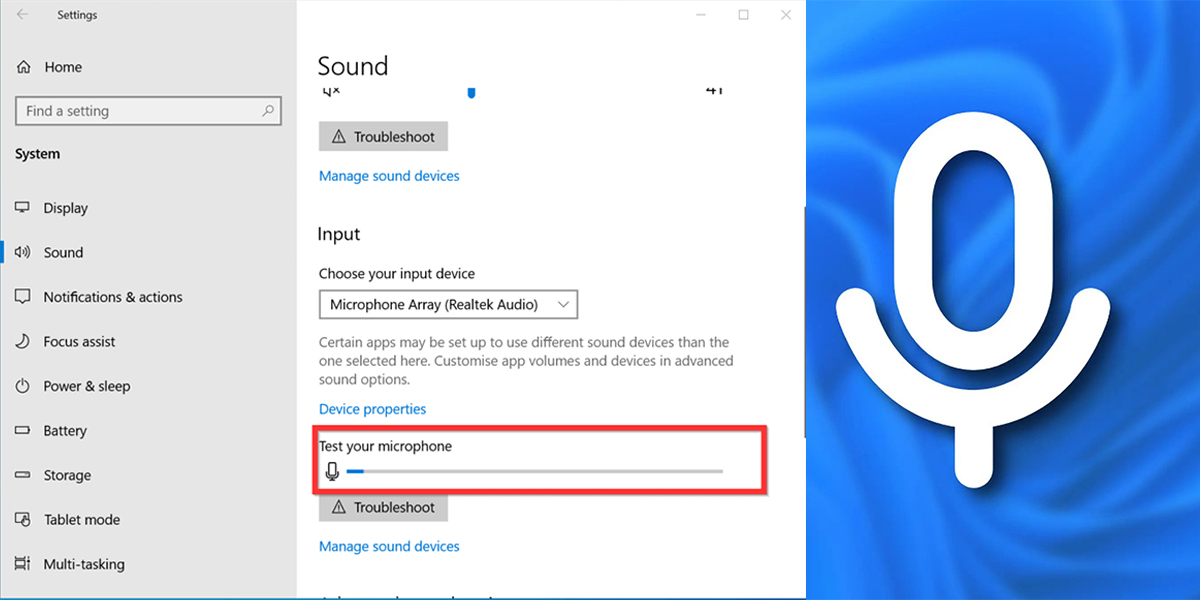
3. Choose the Microphone:
- In the Sound settings window, navigate to the "Input" tab.
- Under "Choose your input device," select your connected microphone from the list.
- If your microphone is not listed, ensure it is properly connected and powered.
4. Adjust Microphone Properties:
- Click the "Device properties" button next to your selected microphone.
- In the "Levels" tab, use the slider to adjust the microphone’s input volume.
- Experiment with the "Microphone boost" setting to amplify the signal if necessary.
- The "Enhancements" tab allows you to apply audio effects, such as noise suppression or echo cancellation, depending on your needs and the microphone’s capabilities.
5. Test the Microphone:
- Click the "Test microphone" button in the Sound settings window.
- Speak into the microphone and ensure your voice is clearly audible through the speakers.
- If there are any issues with audio quality, revisit the "Levels" and "Enhancements" tabs to fine-tune the settings.
6. Configure Default Microphone:
- In the "Input" tab, select the "Set as default" option for your preferred microphone. This ensures it is automatically selected for all applications.
7. Use Microphone in Applications:
- Launch the application where you want to use the microphone, such as a video conferencing tool or recording software.
- In the application’s settings, select your microphone as the input device.
Troubleshooting Microphone Issues in Windows 11
While Windows 11 offers a streamlined microphone setup experience, occasional issues might arise. Here’s a guide to troubleshooting common microphone problems:
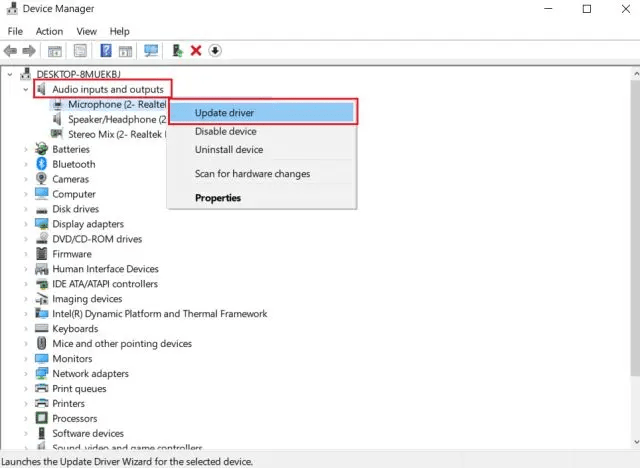
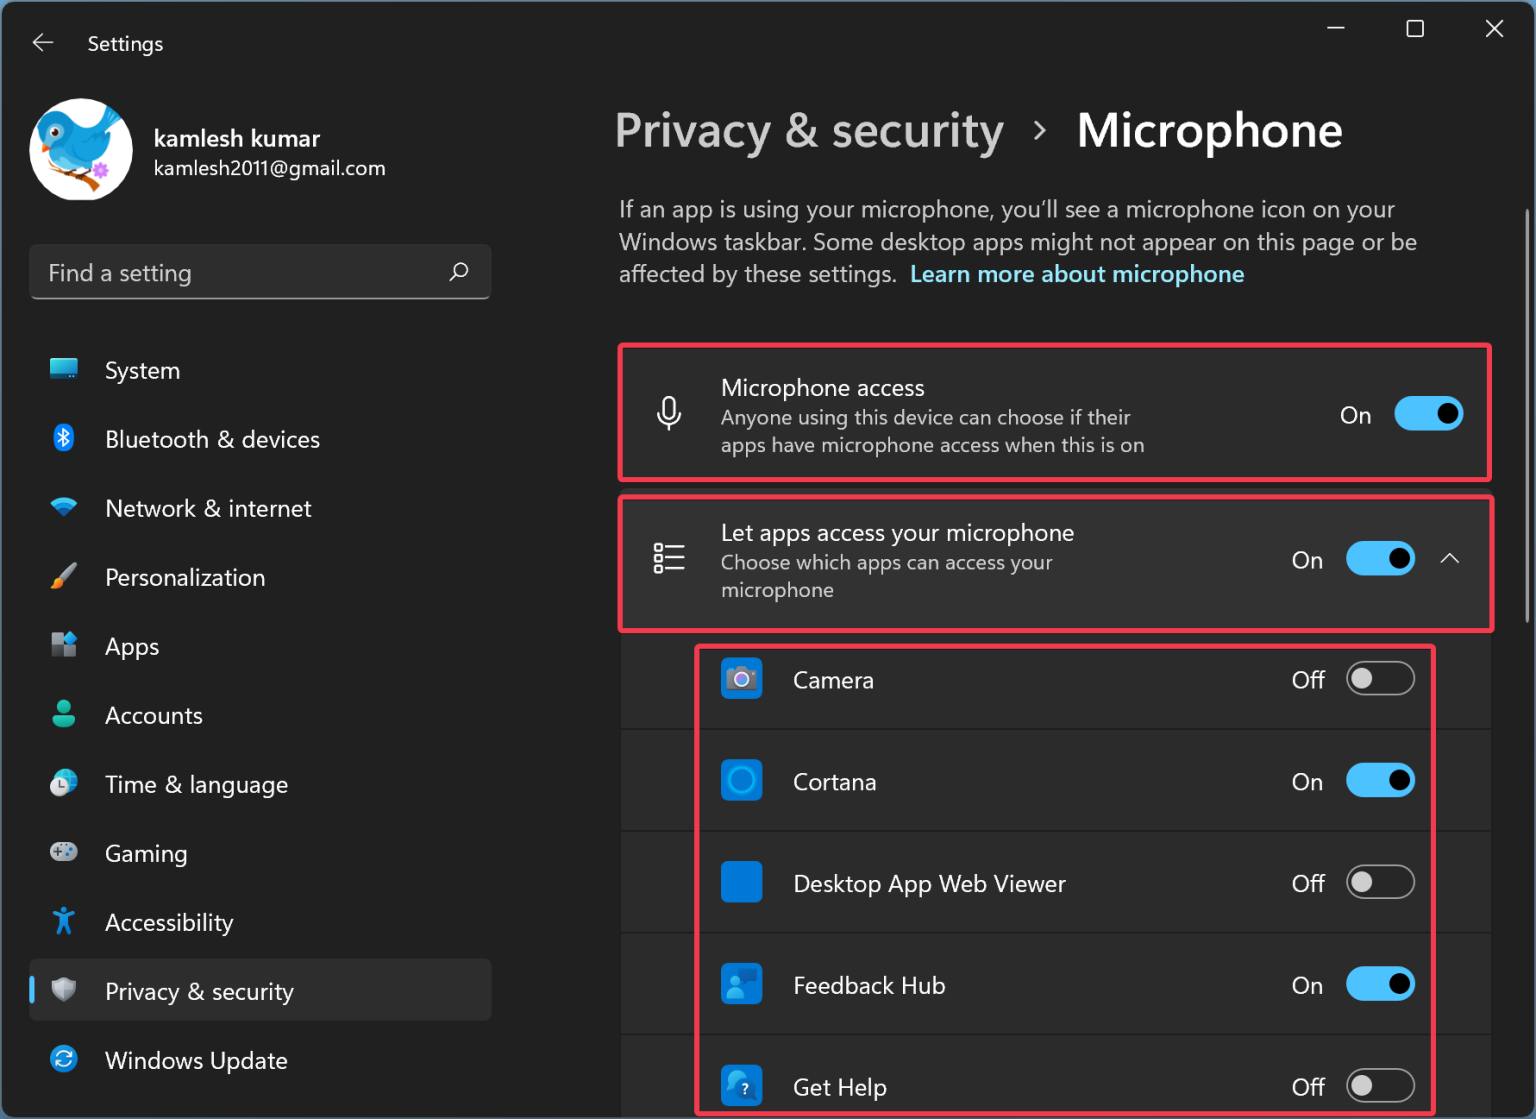
- No Microphone Detected: Ensure the microphone is properly connected and powered. Check the device manager (right-click the Start button and select "Device Manager") for any error messages or driver issues.
- Low Volume: Increase the microphone input volume in the Sound settings window. Consider adjusting the microphone’s physical gain knob if available.
- Distorted Audio: Check for excessive noise or interference. Try moving the microphone away from potential sources of noise, such as fans or speakers.
- Echo or Feedback: Disable any audio effects that might be causing feedback. Ensure the microphone is not positioned too close to speakers or other audio sources.
- Background Noise: Use noise reduction features available in the Sound settings window or within the application you are using.
Tips for Optimizing Microphone Setup in Windows 11
- Choose the Right Microphone: Select a microphone that suits your specific needs and usage scenario. Consider factors like sensitivity, frequency response, and noise handling.
- Position the Microphone Correctly: Place the microphone at a suitable distance from your mouth (about 6-12 inches) and ensure it is not obstructed by any objects.
- Minimize Background Noise: Use a quiet recording environment or employ noise-reducing techniques, such as soundproofing materials or noise-canceling headphones.
- Experiment with Settings: Don’t be afraid to adjust the microphone’s settings, including volume, boost, and enhancements, to achieve the best possible audio quality.
- Use Professional Recording Software: For high-quality audio recording, consider using dedicated recording software that offers advanced features like multi-track recording, editing tools, and effects processing.
FAQs about Microphone Setup in Windows 11
Q: Why is my microphone not working in Windows 11?
A: Several reasons could contribute to a non-functional microphone. Check the connection, ensure the microphone is powered (if applicable), and verify that the correct device is selected in Sound settings. Driver issues or hardware malfunctions may also be responsible.
Q: How do I improve the audio quality of my microphone in Windows 11?
A: Experiment with microphone placement, adjust volume and boost settings, and explore noise reduction features. Using a higher-quality microphone and recording in a quiet environment can also significantly improve audio quality.
Q: How can I reduce background noise when using my microphone in Windows 11?
A: Utilize noise reduction features in the Sound settings window or within the application you are using. Consider using a noise-canceling microphone or recording in a quieter environment.
Q: How do I use multiple microphones simultaneously in Windows 11?
A: Windows 11 supports the use of multiple microphones, but specific configuration may vary depending on the software you are using. Check the application’s settings for microphone selection options.
Q: Can I use a microphone connected to an external audio interface in Windows 11?
A: Yes, you can use microphones connected to external audio interfaces in Windows 11. Ensure the interface is properly connected to your computer and the microphone is configured in the Sound settings.
Conclusion
Setting up a microphone in Windows 11 is a straightforward process that can significantly enhance your communication and recording experiences. By understanding microphone types, connection methods, and navigating the Sound settings, users can optimize their audio setup for various applications. Troubleshooting common issues and implementing practical tips can further improve audio quality and ensure seamless interaction with the digital world. With a well-configured microphone, users can communicate clearly, record high-quality audio, and enjoy a richer digital experience.


Closure
Thus, we hope this article has provided valuable insights into Mastering Microphone Setup in Windows 11: A Comprehensive Guide. We hope you find this article informative and beneficial. See you in our next article!