Managing Access And Permissions: A Guide To Local Users And Groups In Windows 11 Pro
Managing Access and Permissions: A Guide to Local Users and Groups in Windows 11 Pro
Related Articles: Managing Access and Permissions: A Guide to Local Users and Groups in Windows 11 Pro
Introduction
With enthusiasm, let’s navigate through the intriguing topic related to Managing Access and Permissions: A Guide to Local Users and Groups in Windows 11 Pro. Let’s weave interesting information and offer fresh perspectives to the readers.
Table of Content
- 1 Related Articles: Managing Access and Permissions: A Guide to Local Users and Groups in Windows 11 Pro
- 2 Introduction
- 3 Managing Access and Permissions: A Guide to Local Users and Groups in Windows 11 Pro
- 3.1 Local Users: The Foundation of Access
- 3.2 Local Groups: Streamlining Permissions Management
- 3.3 Understanding the Importance of Local Users and Groups
- 3.4 FAQs on Local Users and Groups in Windows 11 Pro
- 3.5 Tips for Effective Local User and Group Management
- 3.6 Conclusion: Empowering Control and Security
- 4 Closure
Managing Access and Permissions: A Guide to Local Users and Groups in Windows 11 Pro
Windows 11 Pro, like its predecessors, offers a robust system for managing access to resources and functionalities on a computer. This is achieved through the use of local users and groups, which serve as the foundation for defining and enforcing permissions across the operating system. Understanding these concepts is crucial for administrators and users alike, as it enables them to control who can access what, ensuring system stability, security, and efficient resource utilization.
Local Users: The Foundation of Access
Local users represent individual accounts on a Windows 11 Pro machine. Each user account is associated with a unique set of permissions, determining the level of access they have to the computer’s resources, applications, and settings. These permissions are defined during user account creation and can be modified subsequently.
Types of Local User Accounts:
- Administrator: The most powerful user account, possessing complete control over the system. Administrators can install software, change system settings, manage other user accounts, and access all files and folders. This account should be used cautiously and only by individuals who require full system control.
- Standard: Standard user accounts have restricted access to the system, primarily designed for everyday users. They can access their own files and folders, use installed applications, and make changes to their personal settings. However, they cannot install software, modify system settings, or manage other user accounts.
- Guest: A temporary account designed for short-term use, offering limited access to the system. Guest accounts typically cannot install software, make changes to system settings, or access other users’ files.
Benefits of Local User Accounts:
- Accountability: Each user account provides a clear record of who accessed specific files or made changes to the system.
- Security: By restricting user permissions, local user accounts limit the potential damage from malicious activity or accidental errors.
- Resource Management: Different user accounts can be allocated different levels of access to specific resources, ensuring efficient utilization and preventing conflicts.
Local Groups: Streamlining Permissions Management
Local groups provide a mechanism to efficiently manage user permissions for multiple users simultaneously. Instead of individually assigning permissions to each user, administrators can group users based on their roles or access requirements and then assign permissions to the group as a whole.
Types of Local Groups:
- Administrators: This group, similar to the Administrator user account, possesses full control over the system and its resources. Members of this group can perform all administrative tasks, including managing other users and groups.
- Users: This group includes all standard user accounts, granting them basic access to the system and its resources.
- Guests: This group encompasses guest user accounts, offering limited access to the system.
Benefits of Local Groups:
- Simplified Management: Grouping users based on their roles eliminates the need to individually manage permissions for each user, saving time and effort.
- Flexibility: Administrators can easily adjust group permissions, ensuring that all members within a group have the necessary access.
- Security: By grouping users based on their roles, administrators can restrict access to specific resources, enhancing system security.
Understanding the Importance of Local Users and Groups
Local users and groups play a vital role in maintaining a secure and efficient Windows 11 Pro environment. They provide a framework for controlling access to system resources, ensuring that only authorized individuals have the necessary privileges. This control is crucial for:
- Preventing Unauthorized Access: By assigning specific permissions to users and groups, administrators can prevent unauthorized access to sensitive data and system settings.
- Maintaining System Stability: Restricting user privileges helps prevent accidental or malicious changes to the system, ensuring its stability and smooth operation.
- Facilitating Collaboration: Local user and group management allows for efficient collaboration by enabling specific users to access shared resources while restricting access to sensitive information.
FAQs on Local Users and Groups in Windows 11 Pro
1. How do I create a local user account?
To create a local user account, open the Settings app, navigate to Accounts, and select Family & other users. Click Add someone else to this PC, and follow the on-screen instructions.
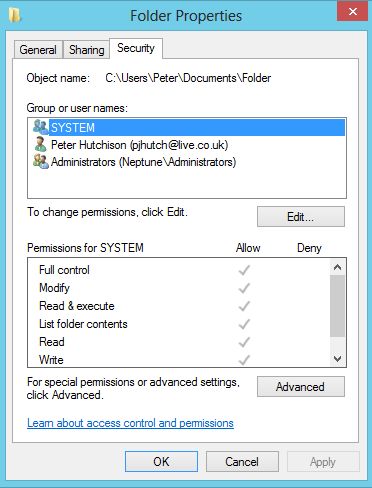
2. How do I change the permissions for a local user account?
Open the Settings app, navigate to Accounts, and select Family & other users. Select the desired user account, and click Change account type. Choose the appropriate account type (Administrator, Standard, or Guest) from the dropdown menu.
3. How do I create a local group?
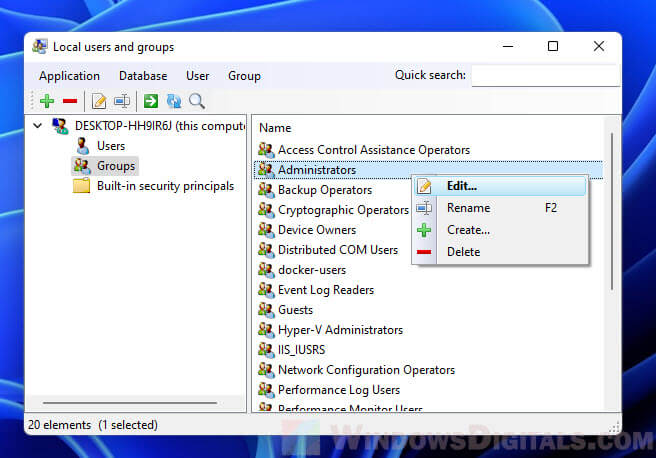
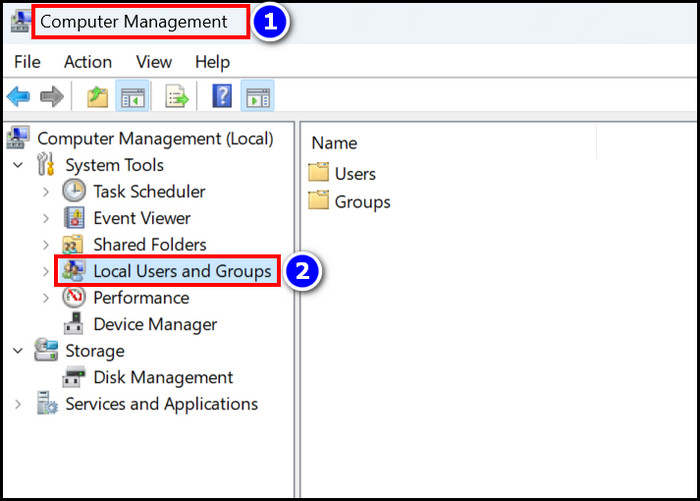
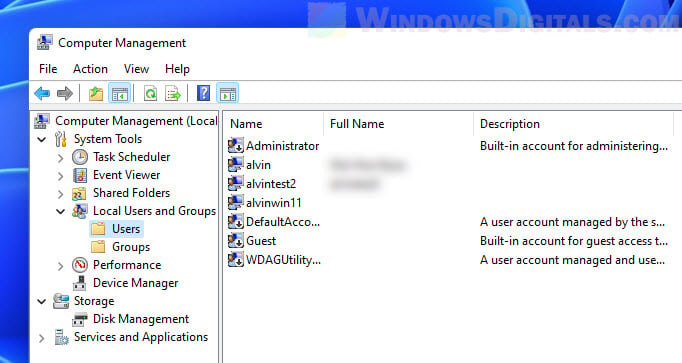
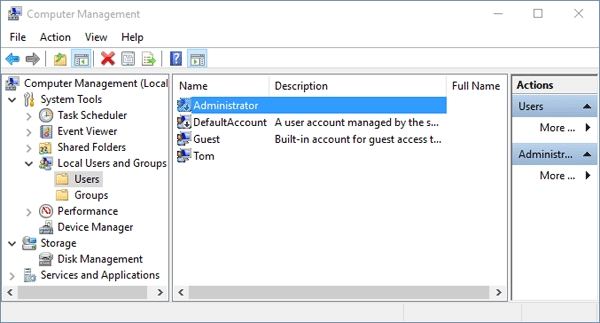
Open the Control Panel, navigate to Administrative Tools, and select Computer Management. Expand Local Users and Groups, and click Groups. Right-click within the right pane, select New Group, and provide a name and description for the new group.
4. How do I add users to a local group?
Open the Control Panel, navigate to Administrative Tools, and select Computer Management. Expand Local Users and Groups, and click Groups. Select the desired group, right-click, and choose Add to Group. Select the desired user account from the list, and click Add.
5. How do I change the permissions for a local group?
Open the Control Panel, navigate to Administrative Tools, and select Computer Management. Expand Local Users and Groups, and click Groups. Select the desired group, right-click, and choose Properties. Navigate to the Members tab, and click Add. Select the desired user accounts from the list, and click Add.
6. What are the differences between local user accounts and local groups?
Local user accounts represent individual users with specific permissions, while local groups are collections of user accounts with shared permissions. Groups simplify permissions management by allowing administrators to assign permissions to a group as a whole, rather than individually to each user.
7. Can I delete a local user account?
Yes, you can delete a local user account. Open the Settings app, navigate to Accounts, and select Family & other users. Select the desired user account, and click Remove.
8. Can I delete a local group?
Yes, you can delete a local group. Open the Control Panel, navigate to Administrative Tools, and select Computer Management. Expand Local Users and Groups, and click Groups. Select the desired group, right-click, and choose Delete.
9. What are some best practices for managing local users and groups?
- Use strong passwords for all user accounts.
- Regularly review user permissions and ensure they are appropriate for their roles.
- Create separate user accounts for different purposes, such as administration, development, and everyday use.
- Use local groups to simplify permissions management and ensure consistent access for users with similar roles.
- Regularly audit user accounts and groups to identify and address any security vulnerabilities.
Tips for Effective Local User and Group Management
- Document User Accounts and Groups: Maintain a clear and up-to-date record of all user accounts and groups, including their permissions and roles. This documentation will be invaluable for troubleshooting and security audits.
- Use Group Policy: Leverage Group Policy to centrally manage user accounts and group permissions across multiple Windows 11 Pro machines. This approach simplifies administration and ensures consistency across the network.
- Regularly Review User Permissions: Periodically review user permissions to ensure they are still appropriate for their roles and that no unnecessary access is granted. This helps maintain security and prevent unauthorized access.
- Enable User Account Control (UAC): UAC is a security feature that prompts users for confirmation before making changes that could affect the system or other users. This helps prevent accidental or malicious changes to the system.
Conclusion: Empowering Control and Security
Local users and groups in Windows 11 Pro provide a powerful and flexible system for managing access to resources and functionalities. By understanding and effectively utilizing these features, administrators can ensure system security, streamline user management, and optimize resource utilization. Through careful planning, consistent monitoring, and adherence to best practices, administrators can leverage the power of local users and groups to create a secure and efficient Windows 11 Pro environment.


Closure
Thus, we hope this article has provided valuable insights into Managing Access and Permissions: A Guide to Local Users and Groups in Windows 11 Pro. We thank you for taking the time to read this article. See you in our next article!