Embracing Java 11: A Comprehensive Guide To Installation On Windows 10 64-bit
Embracing Java 11: A Comprehensive Guide to Installation on Windows 10 64-bit
Related Articles: Embracing Java 11: A Comprehensive Guide to Installation on Windows 10 64-bit
Introduction
With great pleasure, we will explore the intriguing topic related to Embracing Java 11: A Comprehensive Guide to Installation on Windows 10 64-bit. Let’s weave interesting information and offer fresh perspectives to the readers.
Table of Content
Embracing Java 11: A Comprehensive Guide to Installation on Windows 10 64-bit
Java, a robust and versatile programming language, continues to be a cornerstone of software development. Its widespread adoption across diverse applications, from enterprise systems to mobile apps, underscores its enduring relevance. Java 11, released in September 2018, marked a significant milestone in the language’s evolution, introducing new features and enhancements that bolster its capabilities. This article provides a comprehensive guide to installing Java 11 on a Windows 10 64-bit system, ensuring a smooth and efficient experience.
Understanding Java 11: A Foundation for Development
Java 11 is a Long-Term Support (LTS) release, signifying its extended maintenance and support period, making it a reliable choice for both individual developers and organizations. This version offers a range of improvements, including:
-
Local-Variable Type Inference: This feature simplifies code writing by allowing the compiler to infer the type of a local variable, reducing the need for explicit type declarations.
-
New String Methods: Java 11 introduces several new methods for string manipulation, enhancing the language’s string handling capabilities.
-
Enhanced HTTP Client: The introduction of a new HTTP client simplifies the process of making HTTP requests, providing a more modern and efficient approach.
-
Improved Performance: Java 11 includes performance optimizations that enhance the execution speed and efficiency of Java applications.
Navigating the Download Process: A Step-by-Step Guide
Obtaining the Java 11 installation files is straightforward:
-
Visit the Oracle Java Download Page: The official source for Java downloads is the Oracle website. Navigate to the Java SE Downloads page (https://www.oracle.com/java/technologies/javase-downloads.html).
-
Locate the Java 11 Download: On the downloads page, locate the Java SE 11 section. You will find the appropriate download links for different operating systems, including Windows.
-
Select the Windows 64-bit Installer: Choose the installer for Windows 64-bit systems. This ensures compatibility with your operating system architecture.
-
Accept the License Agreement: Before proceeding with the download, carefully read and accept the Oracle Java SE License Agreement.
-
Download the Installer: Click the download link to initiate the download of the Java 11 installer.
Installation on Windows 10: A Seamless Process
Once the download is complete, you can proceed with the installation:
-
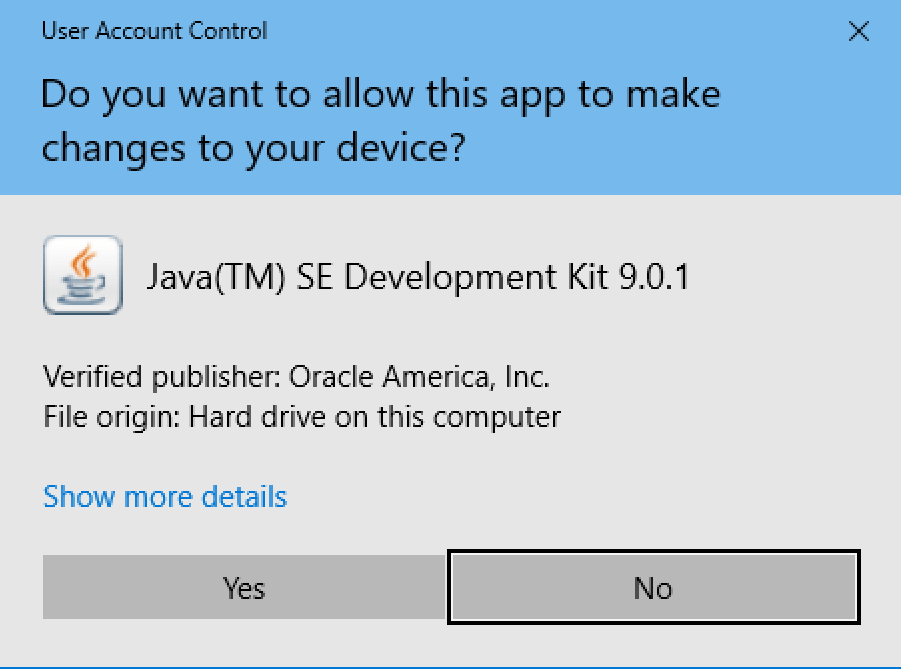
Double-Click the Installer: Locate the downloaded installer file and double-click it to launch the installation process.
-
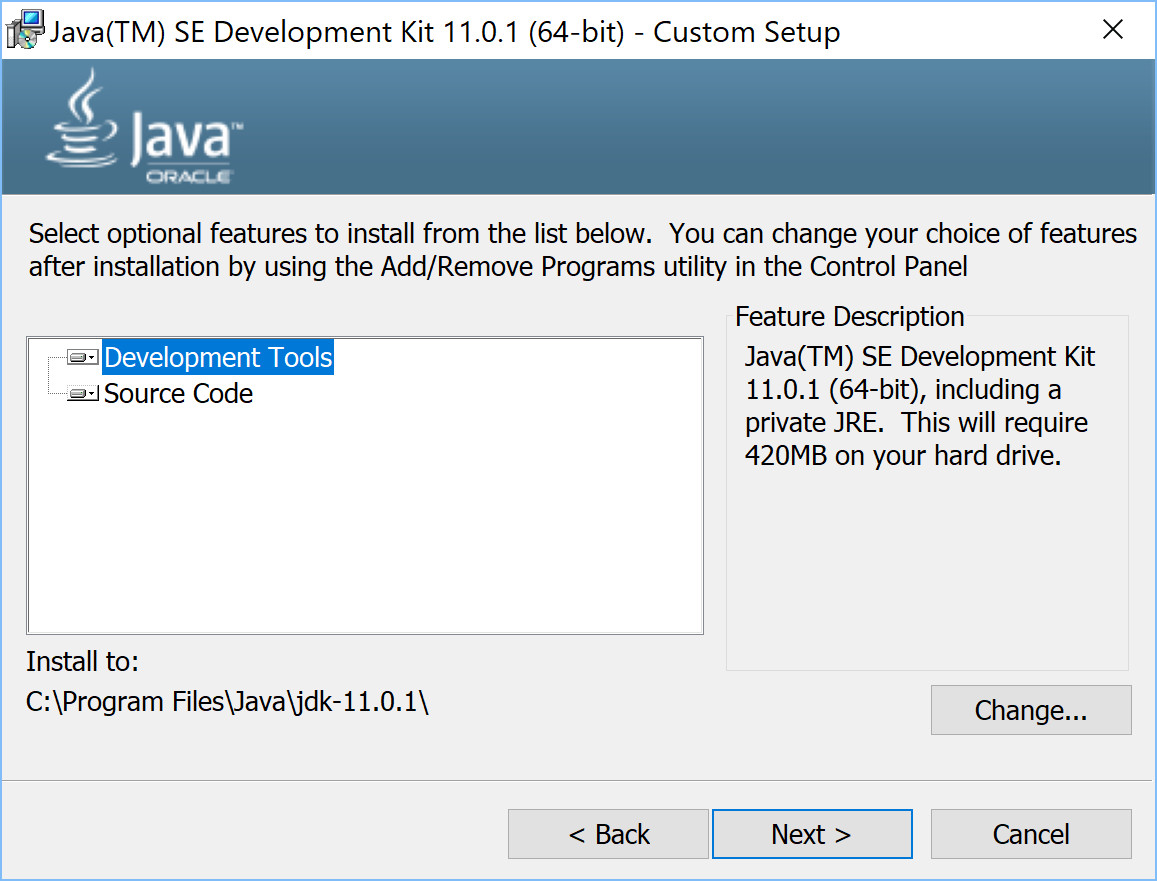
Follow the On-Screen Instructions: The installation wizard will guide you through the steps. Simply follow the prompts and accept the default settings unless you have specific customization requirements.
-
Accept the License Agreement: During the installation process, you will be prompted to accept the license agreement. Review the terms carefully and click "Accept" to proceed.
-
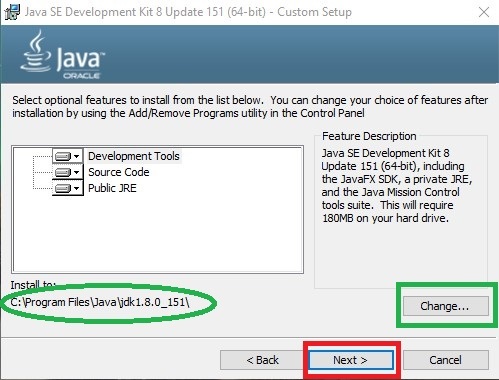
Choose Installation Location: The installer will allow you to choose the installation directory for Java 11. You can accept the default location or specify a different directory if desired.
-
Complete the Installation: Once the installation process is complete, click "Finish" to close the wizard.
Verifying Successful Installation: Ensuring Functionality
After installation, it’s essential to verify that Java 11 is correctly installed and functioning:
-
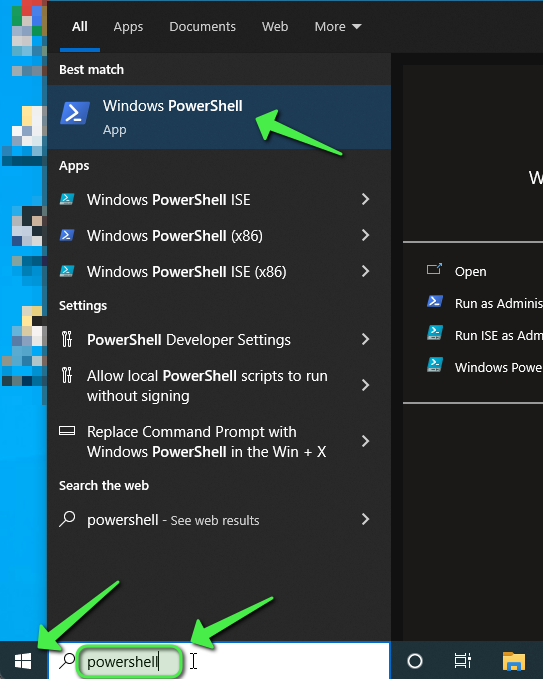
Open a Command Prompt: Press the Windows key, type "cmd", and press Enter to open a Command Prompt window.
-
Execute the "java -version" Command: Type "java -version" in the Command Prompt and press Enter.
-
Verify Java 11 Version: The output should display information about the installed Java version. If the output shows "java version 11" or "11.0", you have successfully installed Java 11.
Beyond Installation: Setting the Java Environment Variable
While the installation process itself is straightforward, setting the JAVA_HOME environment variable is crucial for using Java effectively. This variable helps applications locate the Java installation directory.
-
Access System Properties: Right-click "This PC" (or "My Computer") and select "Properties".
-
Open Advanced System Settings: In the System window, click on "Advanced system settings" in the left-hand pane.
-
Access Environment Variables: In the System Properties window, click on the "Environment Variables" button.
-
Create JAVA_HOME Variable: Under "System variables", click "New". Enter "JAVA_HOME" as the variable name and the path to your Java 11 installation directory as the variable value. For example, if Java 11 is installed in "C:Program FilesJavajdk-11.0.14", the variable value would be "C:Program FilesJavajdk-11.0.14".
-
Add JAVA_HOME to Path Variable: Locate the "Path" variable in the "System variables" list and click "Edit". Click "New" and add "%JAVA_HOME%bin" to the list of paths.
-
Apply Changes: Click "OK" on all open windows to apply the changes.
Harnessing the Power of Java 11: A Gateway to Development
With Java 11 successfully installed and the environment variable configured, you are ready to embark on the world of Java development. Here are some key areas where Java 11 excels:
-
Building Enterprise Applications: Java’s robust framework and libraries make it an ideal choice for developing complex and scalable enterprise applications.
-
Developing Android Apps: Java is a primary language for Android app development, allowing you to create engaging and feature-rich mobile applications.
-
Web Development: Java frameworks like Spring and Jakarta EE empower developers to build dynamic and interactive web applications.
-
Big Data and Analytics: Java plays a crucial role in big data processing and analytics, with frameworks like Hadoop and Spark utilizing its capabilities.
FAQs: Addressing Common Queries
Q1: What are the system requirements for installing Java 11 on Windows 10 64-bit?
A: Java 11 requires a Windows 10 64-bit operating system with at least 2 GB of RAM and 5 GB of free disk space.
Q2: Is Java 11 compatible with older versions of Windows?
A: While Java 11 may run on older versions of Windows, it is officially supported on Windows 10 and later.
Q3: Can I install multiple Java versions on the same system?
A: Yes, you can install multiple Java versions on the same system. However, you need to ensure that the correct Java version is used for your applications by setting the JAVA_HOME environment variable accordingly.
Q4: How do I update Java 11 to a newer version?
A: To update Java 11, you can download the latest version from the Oracle website and follow the installation instructions. However, it is important to note that updating Java may require compatibility checks and adjustments to your applications.
Q5: Is Java 11 free to use?
A: Java 11 is available under the Oracle No-Fee Terms and Conditions, allowing you to use it for development and deployment without any licensing fees. However, Oracle offers commercial support and maintenance options for Java 11.
Tips for a Smooth Java 11 Experience
-
Keep Java Updated: Regularly check for updates to ensure you are using the latest version of Java, which often includes security patches and performance improvements.
-
Use a Java Development Kit (JDK): The JDK provides essential tools for compiling and running Java applications. Ensure you download and install the JDK, not just the Java Runtime Environment (JRE).
-
Configure IDE for Java 11: If you are using an Integrated Development Environment (IDE) like Eclipse or IntelliJ IDEA, configure it to use Java 11.
-
Learn Java 11 Features: Familiarize yourself with the new features and enhancements introduced in Java 11, such as local-variable type inference and the enhanced HTTP client.
Conclusion: Embracing the Future of Java
Installing Java 11 on Windows 10 64-bit is a straightforward process that unlocks access to a powerful and versatile programming language. By following the steps outlined in this guide, developers can seamlessly integrate Java 11 into their projects, leveraging its advanced features and enhanced performance to build innovative and robust applications. As Java continues to evolve, embracing its latest iterations, such as Java 11, empowers developers to stay at the forefront of technological advancements and shape the future of software development.


Closure
Thus, we hope this article has provided valuable insights into Embracing Java 11: A Comprehensive Guide to Installation on Windows 10 64-bit. We hope you find this article informative and beneficial. See you in our next article!