Consolidating Storage In Windows 11: A Guide To Combining Disks
Consolidating Storage in Windows 11: A Guide to Combining Disks
Related Articles: Consolidating Storage in Windows 11: A Guide to Combining Disks
Introduction
With great pleasure, we will explore the intriguing topic related to Consolidating Storage in Windows 11: A Guide to Combining Disks. Let’s weave interesting information and offer fresh perspectives to the readers.
Table of Content
- 1 Related Articles: Consolidating Storage in Windows 11: A Guide to Combining Disks
- 2 Introduction
- 3 Consolidating Storage in Windows 11: A Guide to Combining Disks
- 3.1 Understanding Disk Management in Windows 11
- 3.2 The Importance of Disk Merging
- 3.3 Methods for Merging Disks in Windows 11
- 3.4 Considerations and Precautions
- 3.5 FAQs on Disk Merging in Windows 11
- 3.6 Tips for Merging Disks in Windows 11
- 3.7 Conclusion
- 4 Closure
Consolidating Storage in Windows 11: A Guide to Combining Disks
In the realm of modern computing, managing storage space effectively is paramount. As data accumulates, the need for efficient storage solutions becomes increasingly crucial. Windows 11 offers a range of tools and techniques to streamline storage management, including the ability to combine multiple disks into a single, larger volume. This process, often referred to as disk merging, allows users to consolidate their storage space, improve performance, and simplify data organization.
Understanding Disk Management in Windows 11
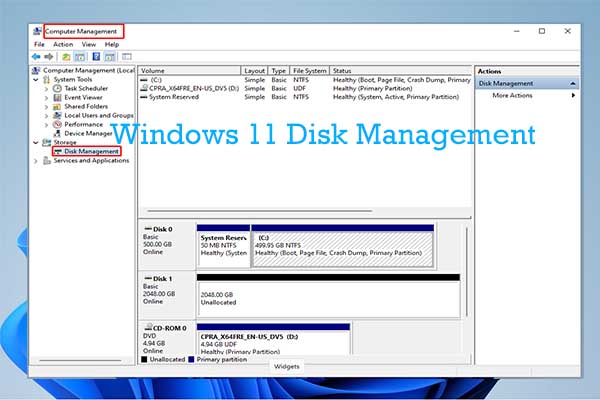
Before delving into the mechanics of merging disks, it is essential to grasp the fundamentals of disk management within Windows 11. The operating system utilizes a system of partitions, which are logical divisions of physical storage devices. Each partition can be formatted with a specific file system, such as NTFS or FAT32, and assigned a drive letter for identification.
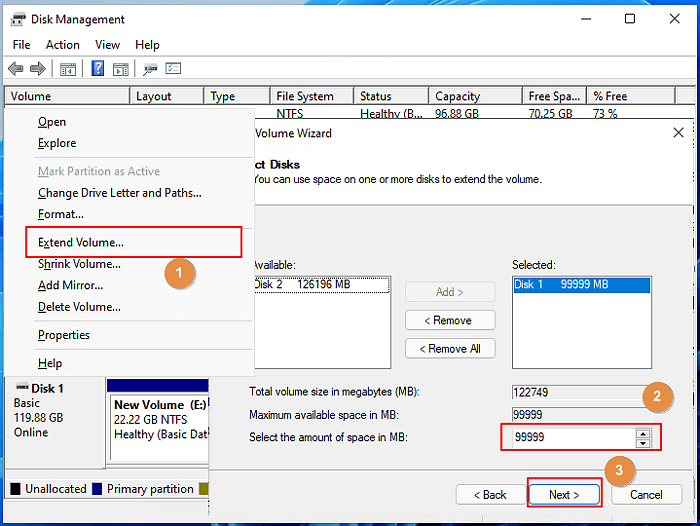
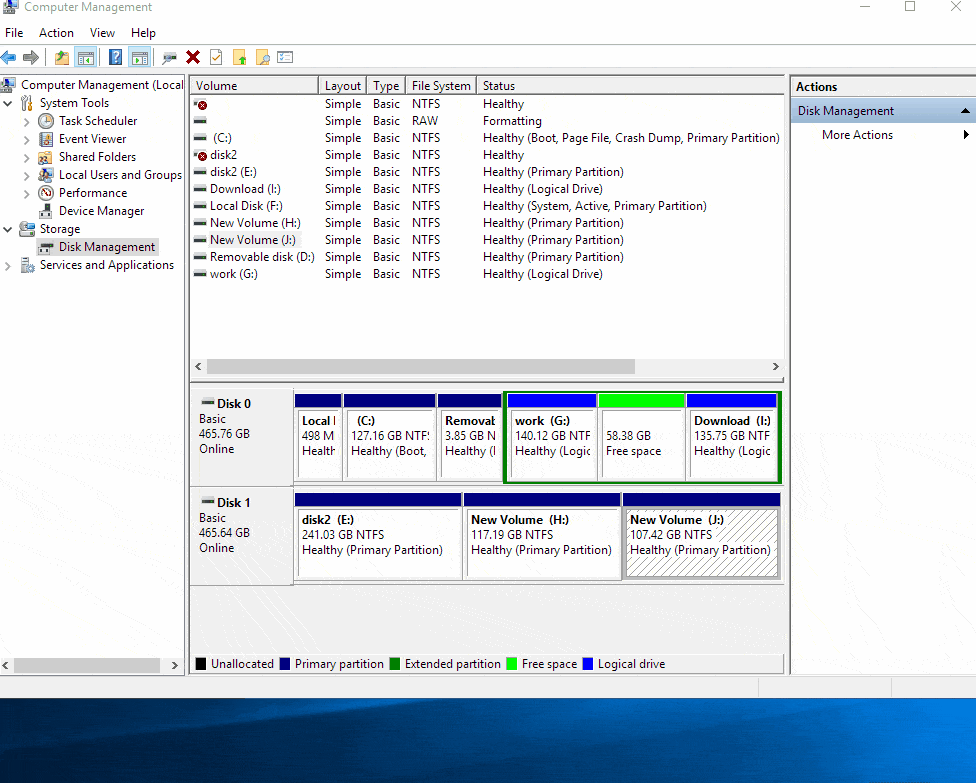
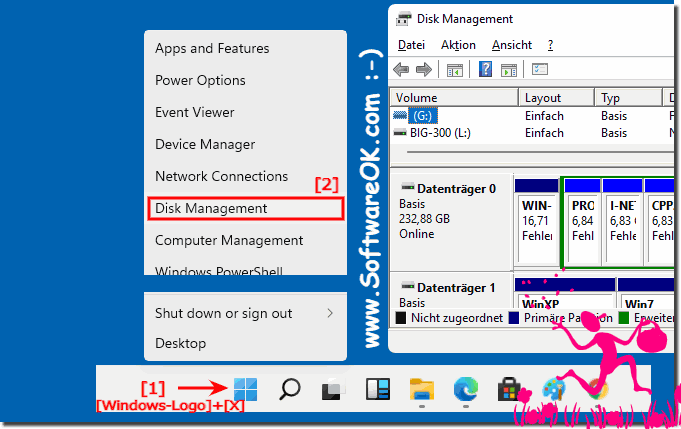
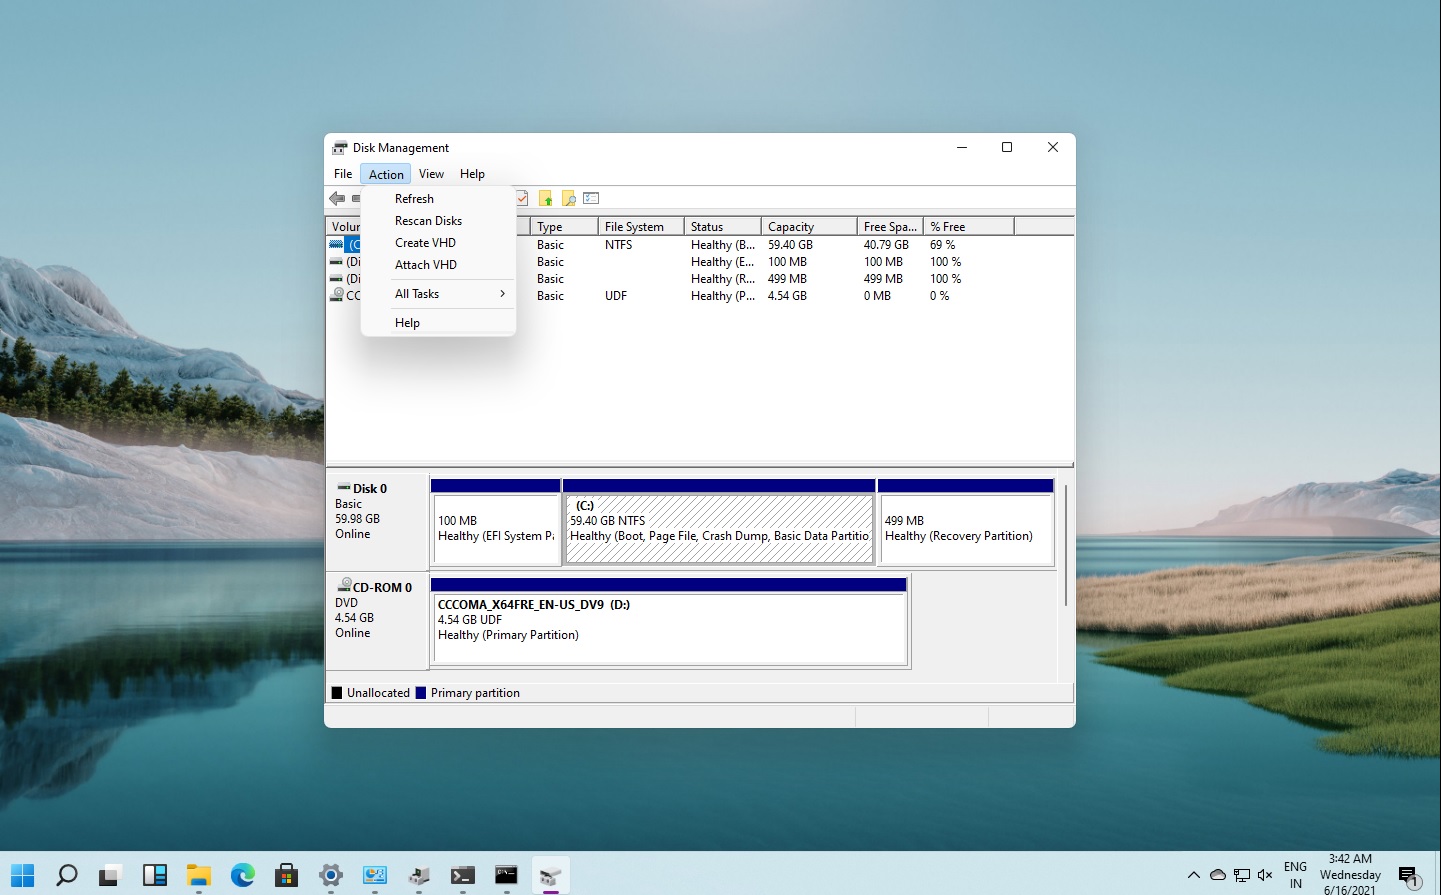
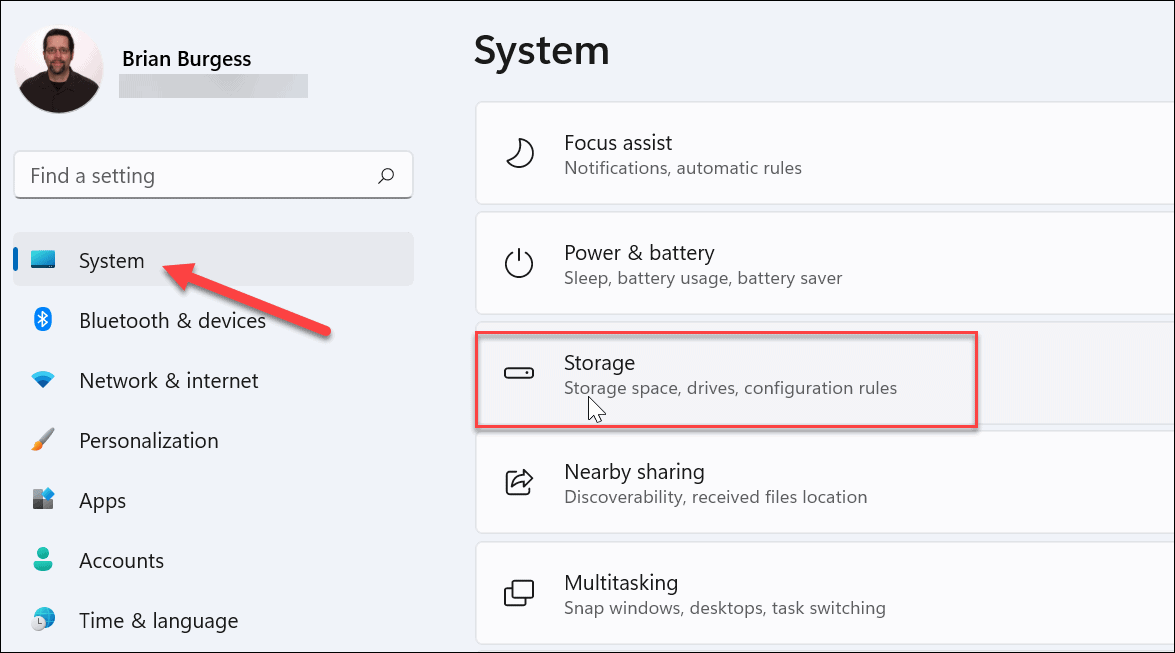
Windows 11 provides a dedicated Disk Management tool, accessible through the Control Panel or by searching for "Disk Management" in the Start menu. This tool offers a graphical representation of all connected storage devices, their partitions, and associated properties. Users can perform various operations within Disk Management, including creating, deleting, resizing, formatting, and converting partitions.
The Importance of Disk Merging
Merging disks in Windows 11 presents numerous benefits, offering users a streamlined and efficient approach to storage management. Here are some key advantages:
- Increased Storage Capacity: Combining multiple disks into a single volume effectively expands the available storage space, accommodating larger files and applications.
- Simplified Data Organization: By merging disks, users can consolidate their data into a single location, simplifying file management and eliminating the need to navigate across multiple drives.
- Enhanced Performance: In certain scenarios, merging disks can lead to improved performance, particularly when working with large files or applications that require access to significant storage space.
- Improved Data Backup and Recovery: Merging disks can facilitate a more efficient backup strategy, allowing users to back up the entire consolidated volume instead of individual drives.
Methods for Merging Disks in Windows 11
Windows 11 offers two primary methods for merging disks:
1. Using Disk Management:
- Prerequisites: This method requires the disks to be unallocated, meaning they do not have any partitions. If the disks contain existing partitions, they must be deleted before proceeding.
-
Steps:
- Open Disk Management.
- Right-click on the unallocated space on one of the target disks and select "New Simple Volume."
- Follow the on-screen prompts to create a new volume, ensuring that the volume size encompasses the entire unallocated space on both disks.
- Repeat the process for the other disk, ensuring that the newly created volumes are assigned the same drive letter.
- Once both volumes are created, they will appear as a single, merged volume within Windows Explorer.
2. Using Third-Party Software:
- Prerequisites: While Disk Management offers a built-in solution, certain third-party software tools provide more advanced features and flexibility for disk merging.
-
Steps:
- Download and install a reputable disk management tool, such as Acronis Disk Director or EaseUS Partition Master.
- Launch the software and select the disks you wish to merge.
- Follow the software’s instructions to merge the disks, ensuring that the process is performed according to the tool’s guidelines.
- Once the merging process is complete, the combined volume will be accessible within Windows Explorer.
Considerations and Precautions
While disk merging offers significant benefits, it is crucial to proceed with caution and consider the following factors:
- Data Backup: Before merging disks, it is essential to create a comprehensive backup of all data on the target disks. This step ensures data protection in case of unexpected errors during the merging process.
- Disk Compatibility: Ensure that the disks you intend to merge are compatible with each other. For instance, merging an SSD with a traditional HDD may lead to performance discrepancies.
- Disk Type: Merging disks of different types, such as SSD and HDD, can impact performance. Consider the intended use of the merged volume before proceeding.
- Operating System: Merging disks that contain the operating system can be complex and potentially lead to data loss or system instability. It is generally recommended to avoid merging system disks.
FAQs on Disk Merging in Windows 11
Q: Can I merge disks with different file systems?
A: It is not recommended to merge disks with different file systems. The merged volume will adopt the file system of the primary disk, potentially leading to data loss or incompatibility issues.
Q: Can I merge disks with different sizes?
A: Yes, you can merge disks with different sizes. The merged volume will encompass the total available space on both disks.
Q: Can I merge a system disk with another disk?
A: While technically possible, it is strongly discouraged. Merging a system disk can lead to data loss or system instability.
Q: What happens to existing data on the disks during the merging process?
A: Existing data on the disks will be retained within the merged volume. However, it is recommended to back up data before proceeding to avoid any potential data loss.
Q: Can I undo the merging process?
A: It is generally not possible to undo the merging process without data loss. If you need to separate the disks, you will likely need to use a data recovery tool to retrieve data from the merged volume.
Tips for Merging Disks in Windows 11
- Use a reputable disk management tool: Choose a reliable and well-regarded tool for merging disks, ensuring that it is compatible with Windows 11.
- Perform data backup: Prioritize data backup before initiating any disk merging operation.
- Check disk health: Ensure that both disks are healthy and free from errors before merging.
- Review partition alignment: If merging SSDs, consider aligning partitions to improve performance.
- Seek professional assistance: For complex or critical disk merging operations, consult a qualified IT professional.
Conclusion
Merging disks in Windows 11 presents a powerful tool for consolidating storage space, improving performance, and simplifying data management. By understanding the process, its benefits, and associated considerations, users can effectively leverage this feature to optimize their storage solutions. Remember to prioritize data backup and proceed with caution, especially when merging system disks. Utilizing reputable tools and seeking professional assistance when necessary can ensure a smooth and successful disk merging experience.


Closure
Thus, we hope this article has provided valuable insights into Consolidating Storage in Windows 11: A Guide to Combining Disks. We thank you for taking the time to read this article. See you in our next article!